




While people will rave about the filling that’s inside of pies, often times the pie crust doesn’t get the respect it deserves for how much it contributes to the flavor & texture of the pie. Many people will tend to resort to using pre-made pie crust that you can buy at the store, and there isn’t necessarily anything wrong with store-bought pie crust (especially if you’re strapped for time and are seeking something that’s convenient). That being said, nothing will ever beat the taste of a homemade pie crust that’s fresh made from scratch. And with this post, I’m happy to share my quick & easy recipe for a crust that can be used with a variety of different pies.
Troubleshooting Pie Crust
My crust came out too tough.
In all likelihood, there’s one of three reasons why your pie crust came out tough. In both instances, it’s related to the extent of gluten development in the dough. If you overwork the dough at any point during the process, the dough will have a tendency to become chewy and rubbery. This is why you should avoid kneading the dough and overmixing it when combining the ingredients. The crust can also turn out tough if you fail to use cold water, as cold water helps to slow yeast & enzyme activity that takes place in the flour. The third reason is because you use too much water. as the dough will end up sticky and thus require a lot more handling.
My crust doesn’t stay together when rolling out.
It’s possible that you may encounter an issue with your pie crust cracking when you attempt to flatten it with a rolling pin. This is a common issue but one that can be prevented. It’s typically caused by one of two things during the preparation/baking process. One reason why is because you failed to use enough water. In such cases, the dough is simply too dry, and the way to fix this is by gradually adding a little bit of water at a time until it’s no longer crumbly. Another reason why could be the dough was allowed to chill for too long, thus the fat & moisture has completely solidified. You should avoid chilling the dough longer than instructed.
The edges of my crust overbakes before the pie is done
It is considered a best practice to par-bake (or partially bake) a pie crust before you add your filling(s) to it. The reason why is because this will help to prevent a soggy crust. But the mistake a lot of people make is that they will bake the edges of their pie crust with the filling and end up burning them up. Because of this, it is recommend that a pie shield be used to help cover the edges of the pie crust so that it’s not receiving direct heat while in the oven. There are many different kinds of pie shields one can use to protect the edge of the crust too (silicone, metal, aluminum foil, etc.).
Tips for Making this Recipe
Brush crust with egg wash. This is not required, I often skip it, and my recipe doesn’t officially call for it. It also won’t really affect how the pie crust tastes once it’s finished. That said, I understand some folks are big on aesthetics when they’re trying to impress others they’re cooking for and are big on making their food look pretty. If you would like for your crust to have a glossy, velvety golden finish, brushing the crust with an egg wash before par-baking it will achieve that. In order to make an egg wash, you would just one egg with one tablespoon of water or another liquid such as milk, half-and-half or heavy whipping cream.
For the best results, freeze your butter. This step is optional, as mere cold butter will be sufficient for this recipe. In fact, the nice part about using cold over frozen butter is that it’s a lot easier to handle from a cutting/slicing and blending standpoint. That being said, the benefit of using butter that is frozen vs cold is that having the butter frozen will ensure that it stays cold throughout the entire mixing process, whereas only cold butter will have a tendency to warm up faster. Thus, the frozen butter will remain separated in small pieces even after it’s been blended, giving the pie crust even more flakiness. Just be sure to use a sharp knife.
For the best results, use ice cold water. While the recipe calls for only using cold water (and it will be sufficient), I would say when it comes to pie crust, the colder the water the better. One way you can achieve this is by placing ice cubes in the water for a few minutes prior to adding the water to the dough, as the ice cubes will help to lower the water temperature even further. Another option would be to place the water in the freezer until just before it becomes frozen, as this will achieve the same effect. But whether you use just plain cold water or ice cold water, you should most definitely avoid using warm water.
For the best results, use a glass pie pan. There are many different kinds of pans you can use for baking pies. For this pie crust recipe, I recommend using a glass pie pan. The reason why is because you will have an easier time gauging the doneness of the crust as a glass pie pan will allow you the ability to see the bottom and sides of the crust as it bakes. The problem with metal pie pans is you can’t really see the crust to determine whether or not it’s done. Meanwhile, the problem with ceramic pie pans is that they tend to be poor conductors of heat, which can lead to a pie crust that cooks unevenly.
Frequently Asked Questions
What can I use if I don’t own pie weights?
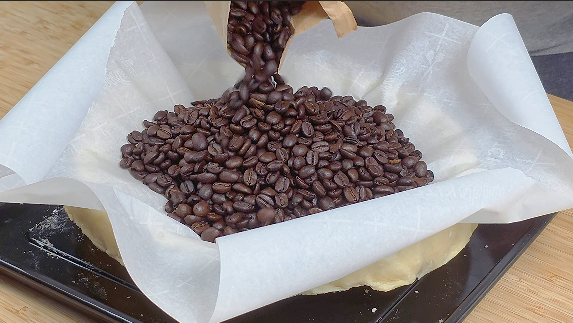
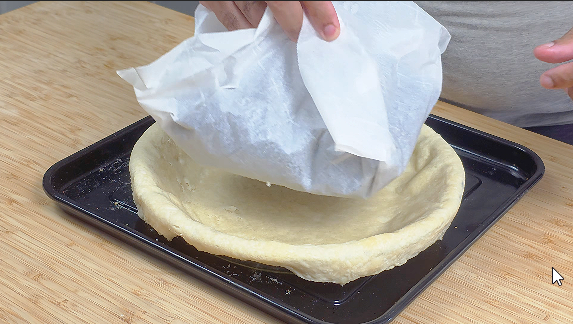
You’d be surprised to know there are many different substitutes can you use in place of pie weights, and they’re likely in your kitchen cabinet right now. I personally use old coffee beans to weigh down my pie crust when I par-bake it. You can also use regular dry beans, rice and lentils to help weigh the crust down as it bakes. Whatever you use for your pie weights, it is still critical that you place them atop parchment paper so that there’s no cross-contamination with the pie crust.
Can I substitute the all-purpose flour for pastry flour?
This pie crust recipe has not been tested with pastry flour, thus I am unable to recommend this substitution with confidence. However, typically, what’s nice about pastry flour is that it has a lower amount of protein than its all-purpose counterparts, which in fact can be beneficial in many baked goods as the pie crust will have an easier time achieving the right amount of tenderness and flakiness. In some instances, you can use a combination of both types of flour for baking. The main issue with pastry flour, however, is that the crust may not be as sturdy as it would be with all-purpose flour. Pastry flour also isn’t nearly as easy to find at grocery stores.
Can I substitute the Butter for Shortening in the pie crust?
I do understand that not everyone is able to eat dairy products and that butter is simply not an option for such individuals. In such cases, you *COULD* replace the butter with shortening, but with a couple of important caveats. For starters, while shortening and butter are both different type of fats that can be used in baked goods, their fat composition is not entirely equal. Shortening tend to have virtually no water in it (thus it’s 100% fat), whereas Butter typically has a water content of 20-25% (depending on the brand).
The other caveat is that the use of cooking oils will change the flavor profile of the pie crust. Seed oils (I.E. Vegetable Oil, Canola Oil, etc.), are known to be neutral-tasting, meaning they have no flavor. So you will be losing the subtle nuttiness / sweetness in your pie crust that Butter offer.
That said, the nice part about shortening is crusts that are made with it tend to do a better job with holding their shape, whereas crusts made with all butter have a tendency with shrink due to the higher water content.
Can you freeze the Pie Crust? And if so, for how long?
You can definitely freeze this pie crust! Once it has cooled completely, ensure it is wrapped tightly to prevent freezer burn and it should maintain their freshness for at least 3 month. While they may still be safe to eat for up to 6 months in the freezer, the pie will gradually lose their flavor and texture after 3 months have passed. Once you’re ready to eat it, it is best to allow the crust to thaw in the refrigerator overnight
How long can you store Sweet Potato Pie in the refrigerator?
Assuming the pie crust is covered or placed in an airtight container, it is safe to eat Sweet Potato Pie that is stores in the refrigerator for at least 3 days. Do note, however, the pie crust will have a tendency to become soggy the longer it sits in the refrigerators due to condensation. After the 4th day, I recommend discarding the pie crust as it may no longer be safe to eat.
Try These Pies With This Crust
Best Pie Crust Recipe
Equipment
- 1 Cooking Spoon
- 1 Large Mixing Bowl
- Food Processor (optional)
- 1 Baking Sheet
- Pie Weights (or substitute)
- 1 9" Pie Pan
- Measuring Cups/Spoons
- Parchment Paper
- 1 Pastry Mat
- 1 Rolling Pin
- 1 Kitchen Shears
Ingredients
Pie Crust *(Skip to Filling if Using Store-Bought Pie Crust)*
- 1 1/4 Cup All-Purpose Flour
- 1/2 Cup Frozen Unsalted Butter
- 2 TSP White Granulated Sugar
- 1/2 TSP Iodized Salt
- 1/4 Cup Cold Water
Instructions
Pie Crust
- Cut up frozen butter into small cubes.
- Combine butter with dry ingredients (Flour, Sugar, Salt) in Food Processor for 15 Seconds.
- Place flour/butter blend in large bowl and add cold water.
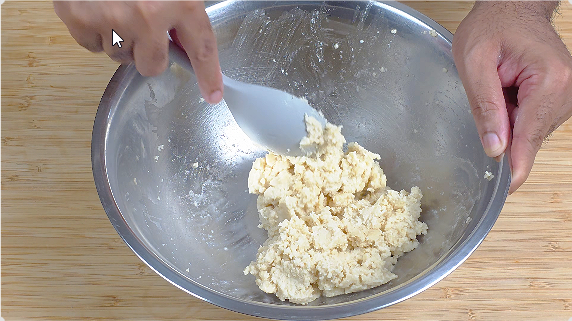
- Mix cold water with flour/butter blend until it forms a dough with a shaggy but moist consistency.
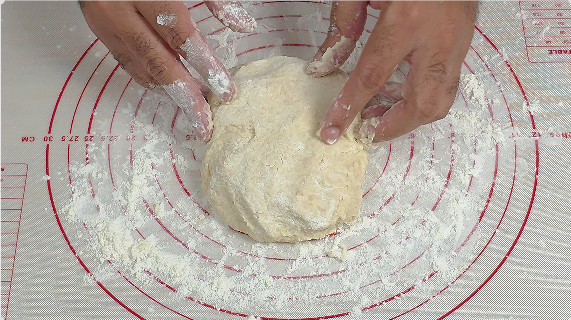
- Place dough on pastry mat (or clean surface) and press together until just combined in the form of a disk.
- Tightly wrap dough in plastic wrap and chill in refrigerator for 30 minutes to 2 hours.
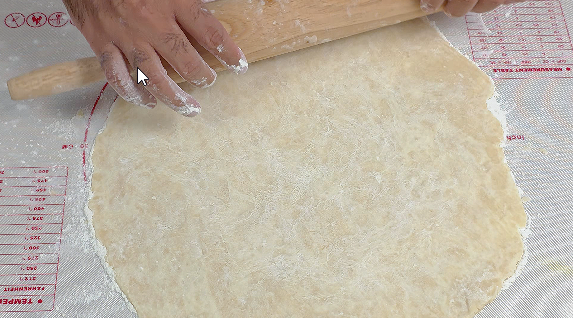
- Remove chilled dough from refrigerator and use rolling pin to flatten into circle that is 10-11" in diameter, forming crust.
- Preheat Oven to 350*F.
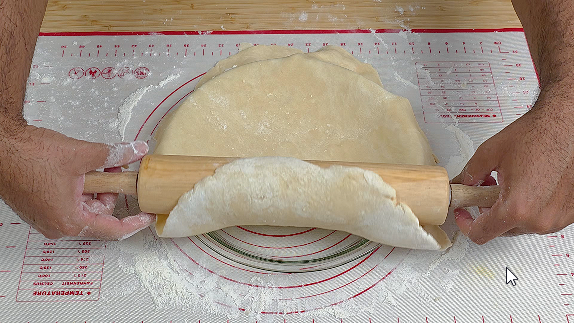
- Place crust into 9" pie pan and cut off any excess edges exceeding 1" in length.
- Place sheet of parchment paper in pie crust and add pie weights (coffee beans, regular beans and rice are all also acceptable) on top of parchment paper.
- Place pie pan on baking sheet and par-bake pie crust in oven for 20 minutes***.
- Once pie crust is done par-baking, remove from oven and transfer to refrigerator for chilling an additional 15-30 minutes.
- Remove pie crust from refrigerator and remove pie weights from pie crust before adding filling