


Banana Pudding has to be my all-time favorite dessert. There are a number of different ways that you can make Banana Pudding too. There’s what I’d call the “new school” way, where you use the Jell-O Instant Pudding mixes and Cool Whip. But there’s also what I could call the “old school way, which is how our grandmas made Banana Pudding when we were younger (and yes, many of us can tell the difference between them when we taste it, despite both being “homemade”). While there’s nothing wrong with the “new school” way if convenience is the goal, I’m going to show you how to make the best Banana Pudding From Scratch that you’ve ever had (the “old school” way!).

Key Ingredients for Classic Banana Pudding
Banana pudding from scratch is made from your standard ingredients: Thickener, Whole Bananas, Egg Yolks, Table Salt, Sugar, Butter, and Vanilla Extract. That said, what makes this recipe stand out from the rest is the use of Evaporated Milk and Banana Extract.
- Evaporated Milk: Most recipes call for using whole milk. The thing with whole milk is that it has water content upwards of 85% to 90%. This poses a couple differences in the banana pudding. One, the evaporated milk in combination with the flour takes less time to thicken because it has a higher concentration of milkfat and the vast majority of the water removed. In addition, the relative lack of water in the evaporated milk helps to give the custard a richer flavor with even a slight caramelized undertone, giving the banana pudding a somewhat more complex taste. For these reasons, I find using evaporated milk vs. whole milk makes for a better Banana Pudding, which is what my recipe calls for.
- Banana Extract: This ingredient may be somewhat controversial, but I say don’t knock it until you try it! At this root, a traditional banana pudding is essentially vanilla custard with whole banana slices and vanilla wafers. So that being said, you’ll find most recipes only call for the addition of Vanilla Extract for flavor enhancement. But in my opinion, that’s a bit boring. After all, it stands to reason that the custard in banana pudding should actually have banana flavor in it. And that’s what my recipe achieves with the addition of banana extract. And the best part of all? For folks who prefer banana pudding without bananas, banana extract works great for a substitute (versus just a flavor enhancer) too.
- Flour vs. Cornstarch as a Thickener: Both Flour and Cornstarch are commonly used as thickeners because they’re primarily made up of starch. Once you cook the starch, the molecules in the starch while being heated will quickly absorb all of the excess moisture in the dish you’re preparing, which is what helps it to thicken. That said, after doing quite a bit of testing, I prefer to use Flour for this recipe (for a couple reasons). One, because flour tends to contain protein in addition to starch, the ingredients in your “pudding” can withstand a longer cooking time and are less likely to split (meaning become oily/runny). But also, for that same reason, the added protein in flour helps to make for a thicker custard.
And lastly, there’s one more thing I can’t stress enough. You have to be extremely careful when you’re adding raw eggs (or in this case, egg yolks) to dishes that you’ll be boiling. If you expose the eggs to high heat too quickly, or if you allow the eggs to coagulate into curds as they cook, you’ll end up with lumpy egg scrambles in your banana pudding (which, while edible, are unappetizing from a texture standpoint). That’s why you must briskly whisk the custard non-stop from the time you start heating it until the time it’s done (and even a couple minutes after removing it from the heat), as this will prevent the egg liquid from solidifying as it cook.

Tips for Making this Recipe
Lightly beat the egg yolks in a separate bowl. This is so the eggs will be in a fully liquid state before you attempt to combine them with the other ingredients (milk, sugar, salt, etc.) in the pot. This is another safeguard to ensure the egg yolks are able to emulsify evenly throughout the custard. While it is an extra step, this should only take a few additional seconds.
Be patient. I understand that we all have demanding lives and our time is extremely valuable, so it’s always great when we can find “hacks” that make cooking easier or faster. Unfortunately, this is one of those recipes where there aren’t any real short cuts to the process. I strongly advise against stepping away from the stove while the preparing the custard, and I strong advise against adjusting the temperature as it cooks. The pot (or saucepan) should be kept at a stable medium heat until it is thick, to ensure the best results. Otherwise, you risk either having egg scrambles in your custard or runny custard. It’ll all be worth it once you taste the banana pudding!
Cover the custard while it cools. Why? Once you’re done cooking the custard and it cool, as the moisture evaporates from its surface, a layer (which can also be best described as a “membrane”) will form on top. By covering the custard, that will prevent the moisture from evaporating and thus prevent this layer of skin from forming. That being said, this step is completely optional. Me personally, I opt not to do this (especially because the custard will only be resting for a few minutes, versus say hours). I would just advise giving the custard a brisk whisk to break up the membrane and rehydrate the surface of the custard before you proceed with assembling your banana pudding.
Use a sieve to strain the custard. This is yet another optional step, and I often skip this step as well (in large part because I’m made this recipe so many times that I can do it in my sleep!). That said, I strongly recommend (especially if you’re a beginner cook and have never made banana pudding from scratch before) straining your custard through a sieve into a separate bowl before assembling your banana pudding. This will be an additional safeguard to ensure you don’t have any egg scrambles or lumps of flour in your final product.

Frequently Asked Questions
What kind of Vanilla Wafers should I use?
So there are some food snobs out there who will insist that you can’t possibly have banana pudding without using Nilla brand Vanilla Wafers (which is wild to me, because Nilla brand Vanilla Wafers aren’t even made with real Vanilla and haven’t been for over 30 years, but that’s a conversation for another day, haha!). Me personally, I frankly don’t care what you use (just as long as it’s vanilla wafers). I understand that everyone has varying financial situations and varying access to grocery stores, so Vanilla Wafer brands other than Nilla are perfectly fine for this recipe. And if you’re a real overachiever, by all means, feel free to make your own vanilla wafers from scratch!
Can I substitute Cornstarch for Flour?
I don’t recommend it. Typically, in most dishes, you can in fact substitute cornstarch for flour. The main issue is flour tends to also contain fiber in addition to starch, whereas Cornstarch is pure starch (the main ingredients that thickens custards). So ultimately, you’d have to use twice as much flour in a recipe to get the same amount of thickening you would with cornstarch. That being said, the reason I recommend against this substitution for my banana pudding recipe is because it may lead to a custard with a thinner consistency and the cooking time may vary widely
Can I substitute Margarine for Butter?
The answer to this question always gets tricky.
While you may be able to replace the butter in this recipe with margarine, there are a couple of caveats that should be kept in mind. One, their fat/water composition is not entirely equal. Typically, margarine will have somewhat more water and somewhat less fat than butter, which could end up negatively affecting the texture of the custard. In addition, margarine is made using seed oils, which are known to be neutral tasting (meaning they have no flavor). So you will be losing the subtle nuttiness / sweetness in your custard that butter offers.
All of that said, the short and sweet answer I can give you is I *DON’T* recommend it. For a more detailed answer, see above.
Can I substitute the whipped cream for meringue?
You absolutely can (if desired)! That being said, it will require an additional step as once you top the banana pudding, you will have to broil the meringue in the oven for a few minutes in order to cook the raw egg whites. You’d make the meringue in a similar way as whipped cream, except you would replace the heavy whipping cream with egg whites (which you should preserve once separating the egg yolks) and add cream of tartar.
Can I use unripe bananas for this recipe?
I don’t recommend it. Ripe bananas tend to be sweeter and have a softer texture, which is exactly what you want in a dessert such as pudding. Ripe bananas tend to be firmer due to their higher starch content and are also more tart in flavor. Ideally, when looking for the right bananas at the supermarket, you want banana that have a bright, vibrant yellow skin color with specs of brown on them. These, in my humble opinion, are the perfect bananas for banana pudding. Meanwhile, avoid bananas that are green or have a yellowish-green hue.
How long can I store in the refrigerator?
As long as the banana pudding is covered, it should be safe to eat for at least 3 days. After 3 days, it may begin to lose its flavor & texture. Once 5 days have passed, I would advise that you dispose of the banana pudding as it may no longer be safe to eat,

Try These Other Dessert Recipes
-
Best Chocolate Pudding From Scratch
-
Best Vanilla Pudding From Scratch
-
Best Brownies From Scratch
-
Best Pumpkin Pie Recipe
Best Banana Pudding From Scratch
Equipment
- 1 Whisk
- Hand *OR* Stand Mixer
- 1 Plastic Spatula
- Fork
- Spoon
- 1 3qt Mixing Bowl
- 1 3qt Saucepan
- 1 8x8 Baking Dish
- Measuring Cups/Spoons
- 1 Butcher Knife
- Food Processor (optional for crushing wafers)
- 1 Mallet (optional for crushing wafers)
- 1 Medium Bowl (optional for holding banana slices)
Ingredients
- 1/3 Cup All-Purpose Flour
- 1/2 Cup White Granulated Sugar
- 1/4 TSP Iodized Salt
- 2 Cans Evaporated Milk
- 2 TBSP Unsalted Butter (Room Temperature)
- 1 TSP Vanilla Extract
- 1 TSP Banana Extract
- 1 Box Vanilla Wafers
- 2 Large Ripe Bananas (or 3 Medium Ripe Bananas)
- 3 Extra Large Egg Yolks
Whipped Cream
- 1 Cup Heavy Whipping Cream
- 1/4 Cup Powdered Sugar
- 1/2 TSP Vanilla Extract
Instructions
Custard
- Separate egg yolks from egg whites
- Add flour salt, sugar, eggs and milk to cool 3qt saucepan and whisk until combined, ensuring few/no clumps
- Warm saucepan on medium heat and whisk briskly non-stop until thickened. On electric stove, this should take approx. 15-20 minutes. Cooking times will vary with gas stove or induction top.
- After 15-20 minutes (or once desired thickness is reached), immediately remove from heat and continue whisking briskly for additional 2-3 minutes.
- Add butter and 1 TSP vanilla/banana extract to custard then whisk until combined
- Allow custard to cool for up to 15 minutes.
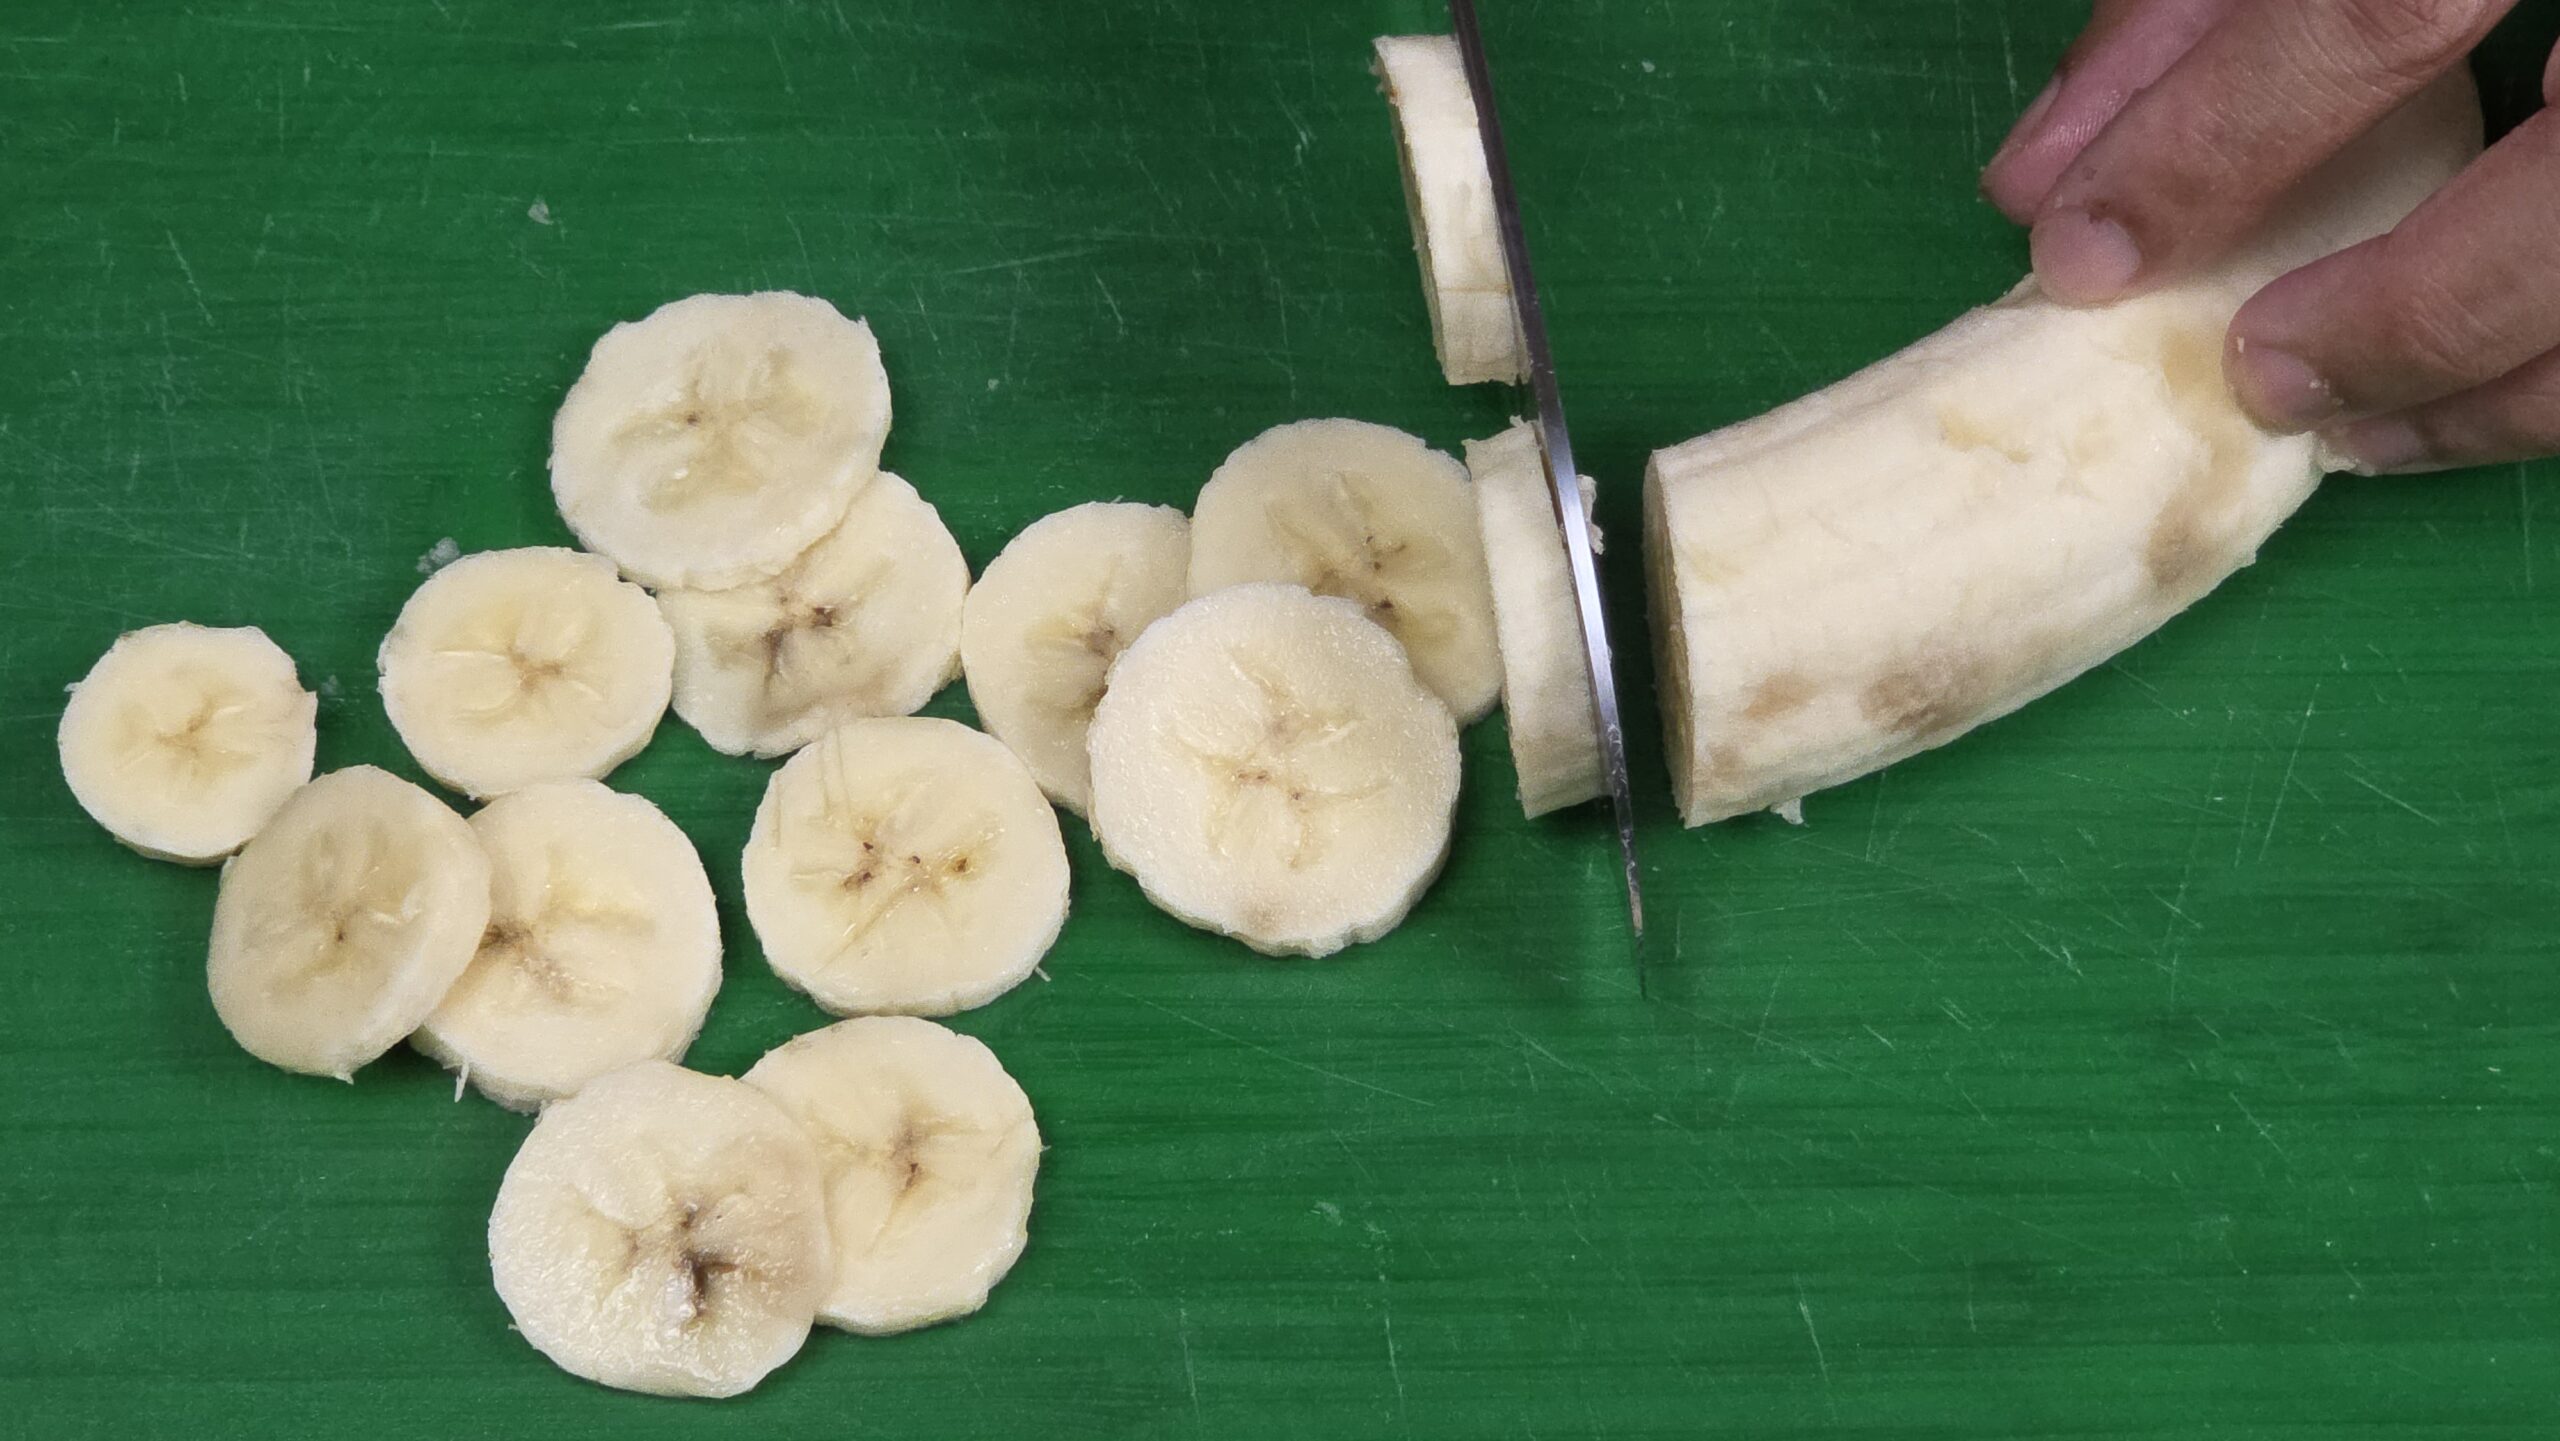
- Cut bananas into small round slices.
- Layer your banana pudding, starting with wafers, bananas then custard, and repeat once.
- Top final layer of custard with whipped cream and smooth until forming an even layer and everything is covered.
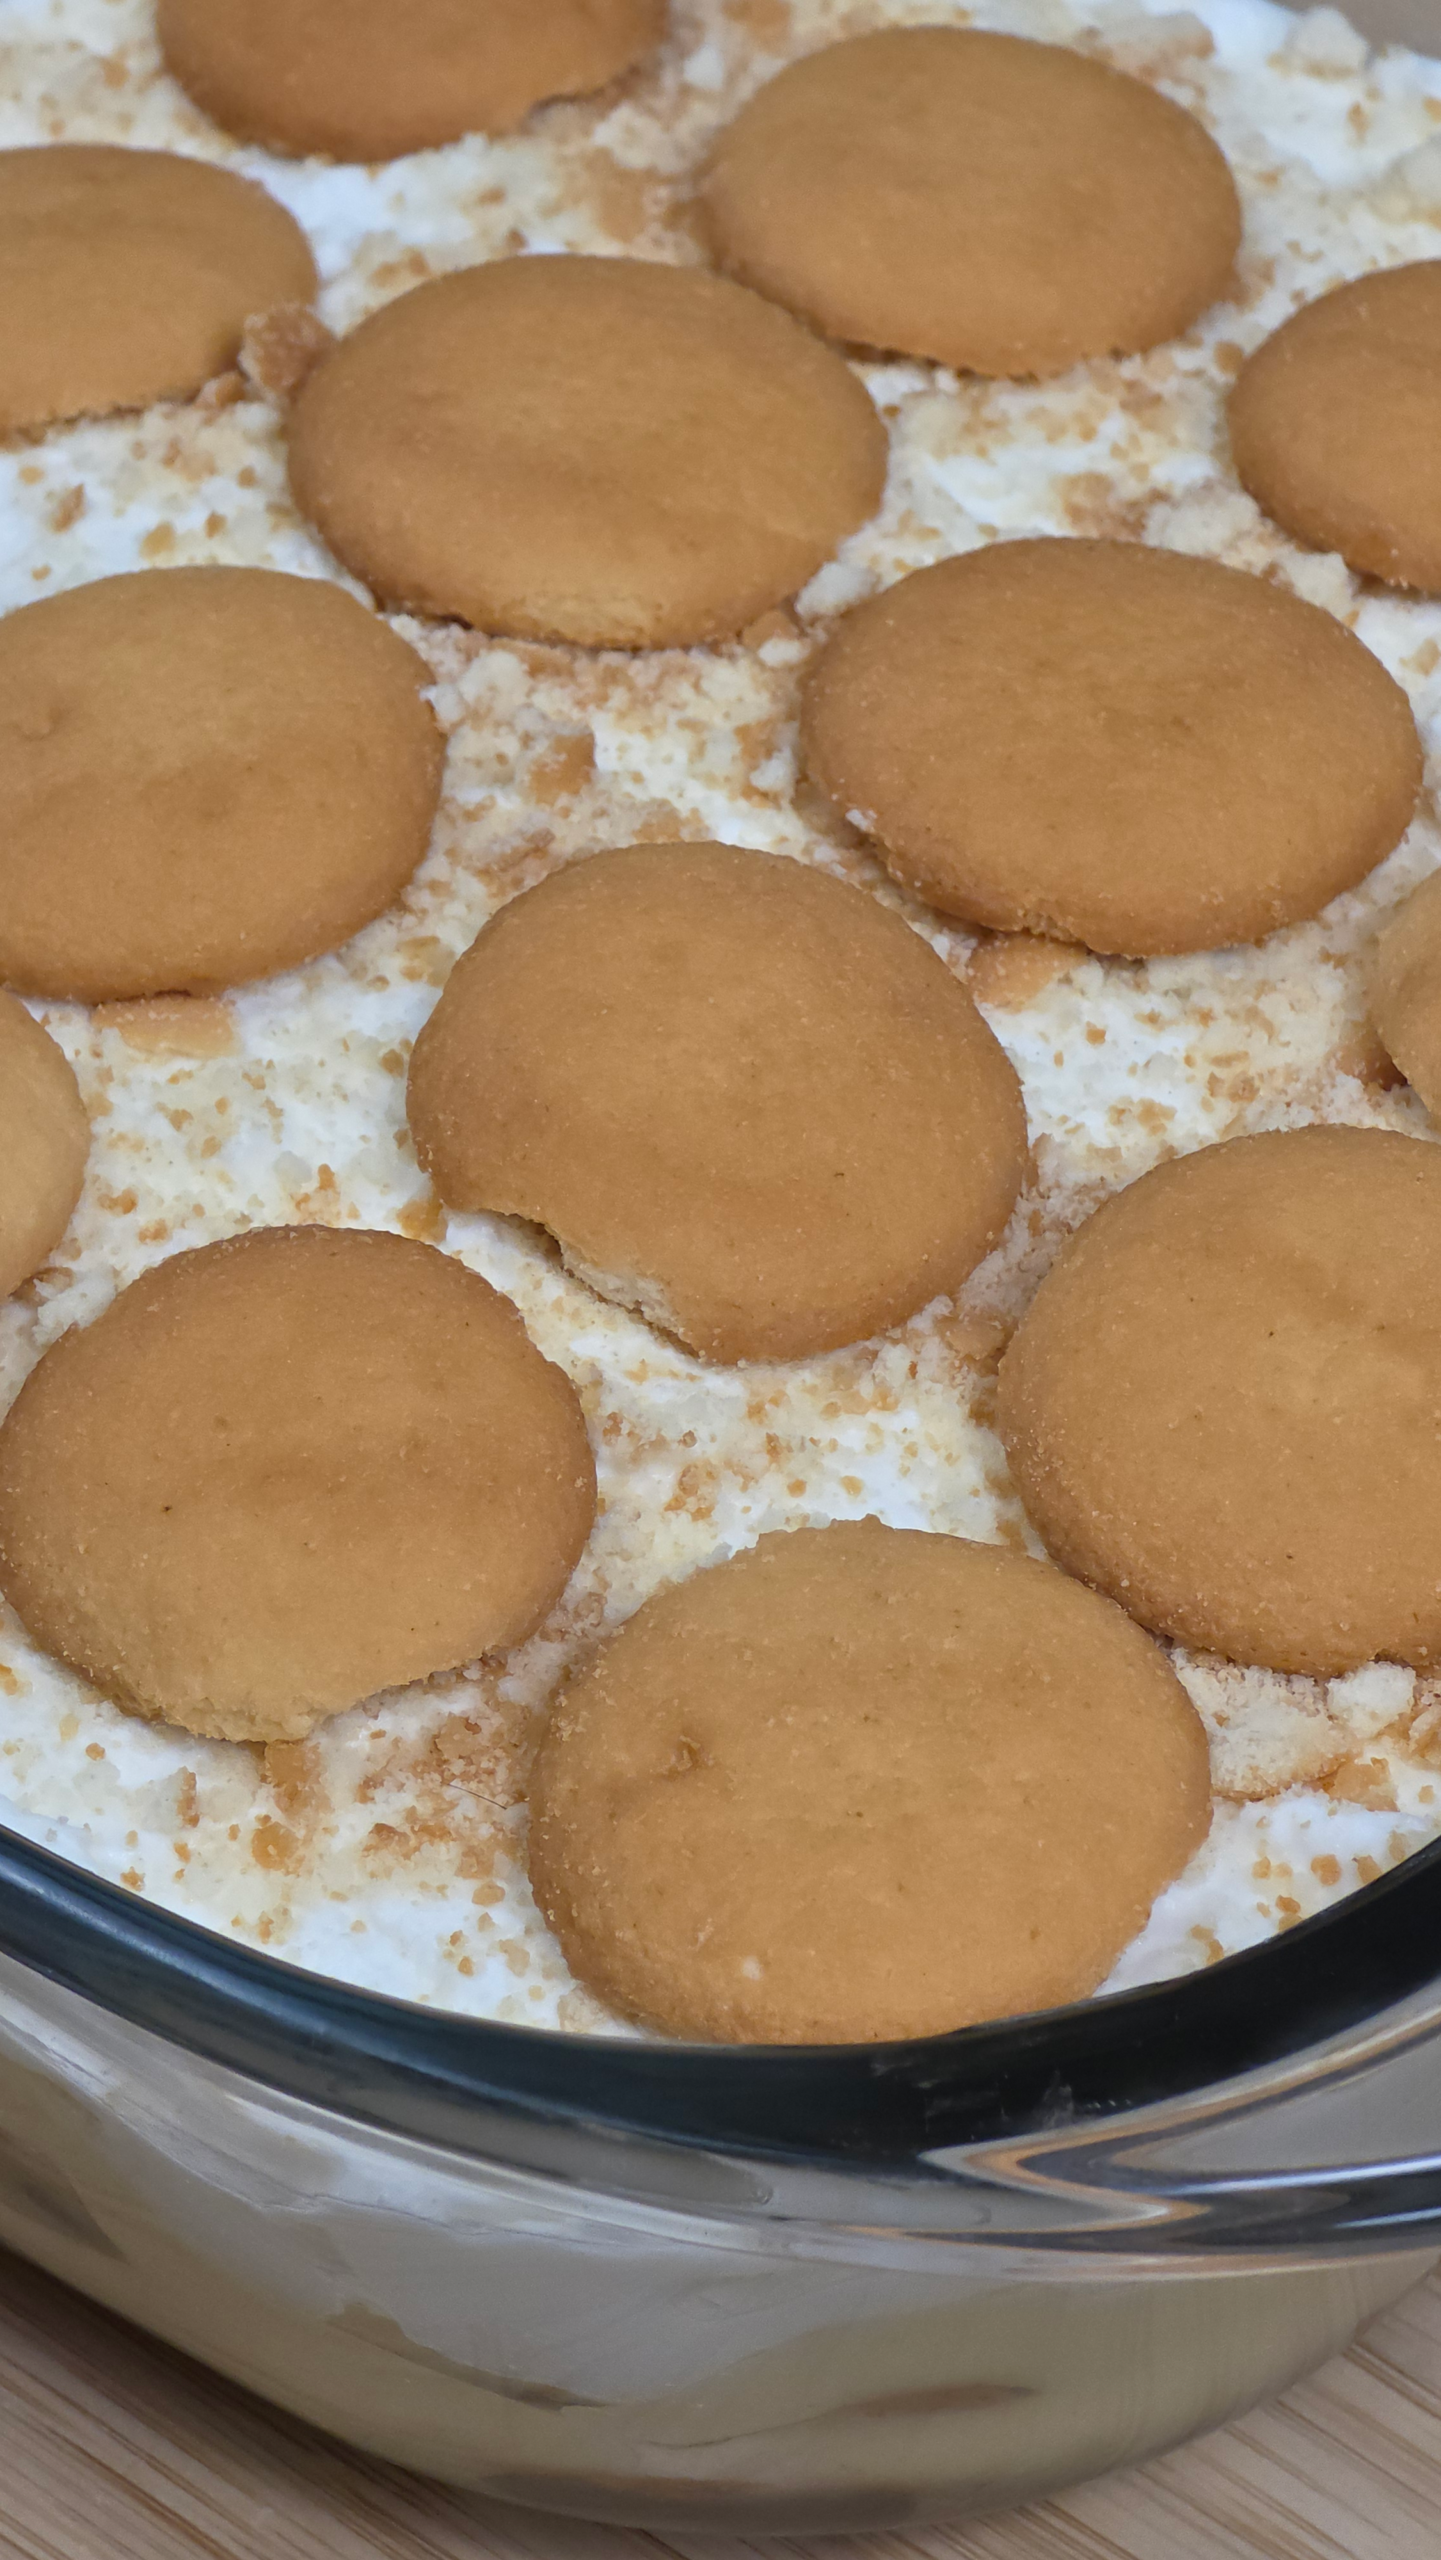
- Decorate top of banana pudding with final layer of wafers and garnish with crushed wafers.
- Cover and place in refrigerator for a minimum of 4 hours (overnight for best results).
Whipped Cream
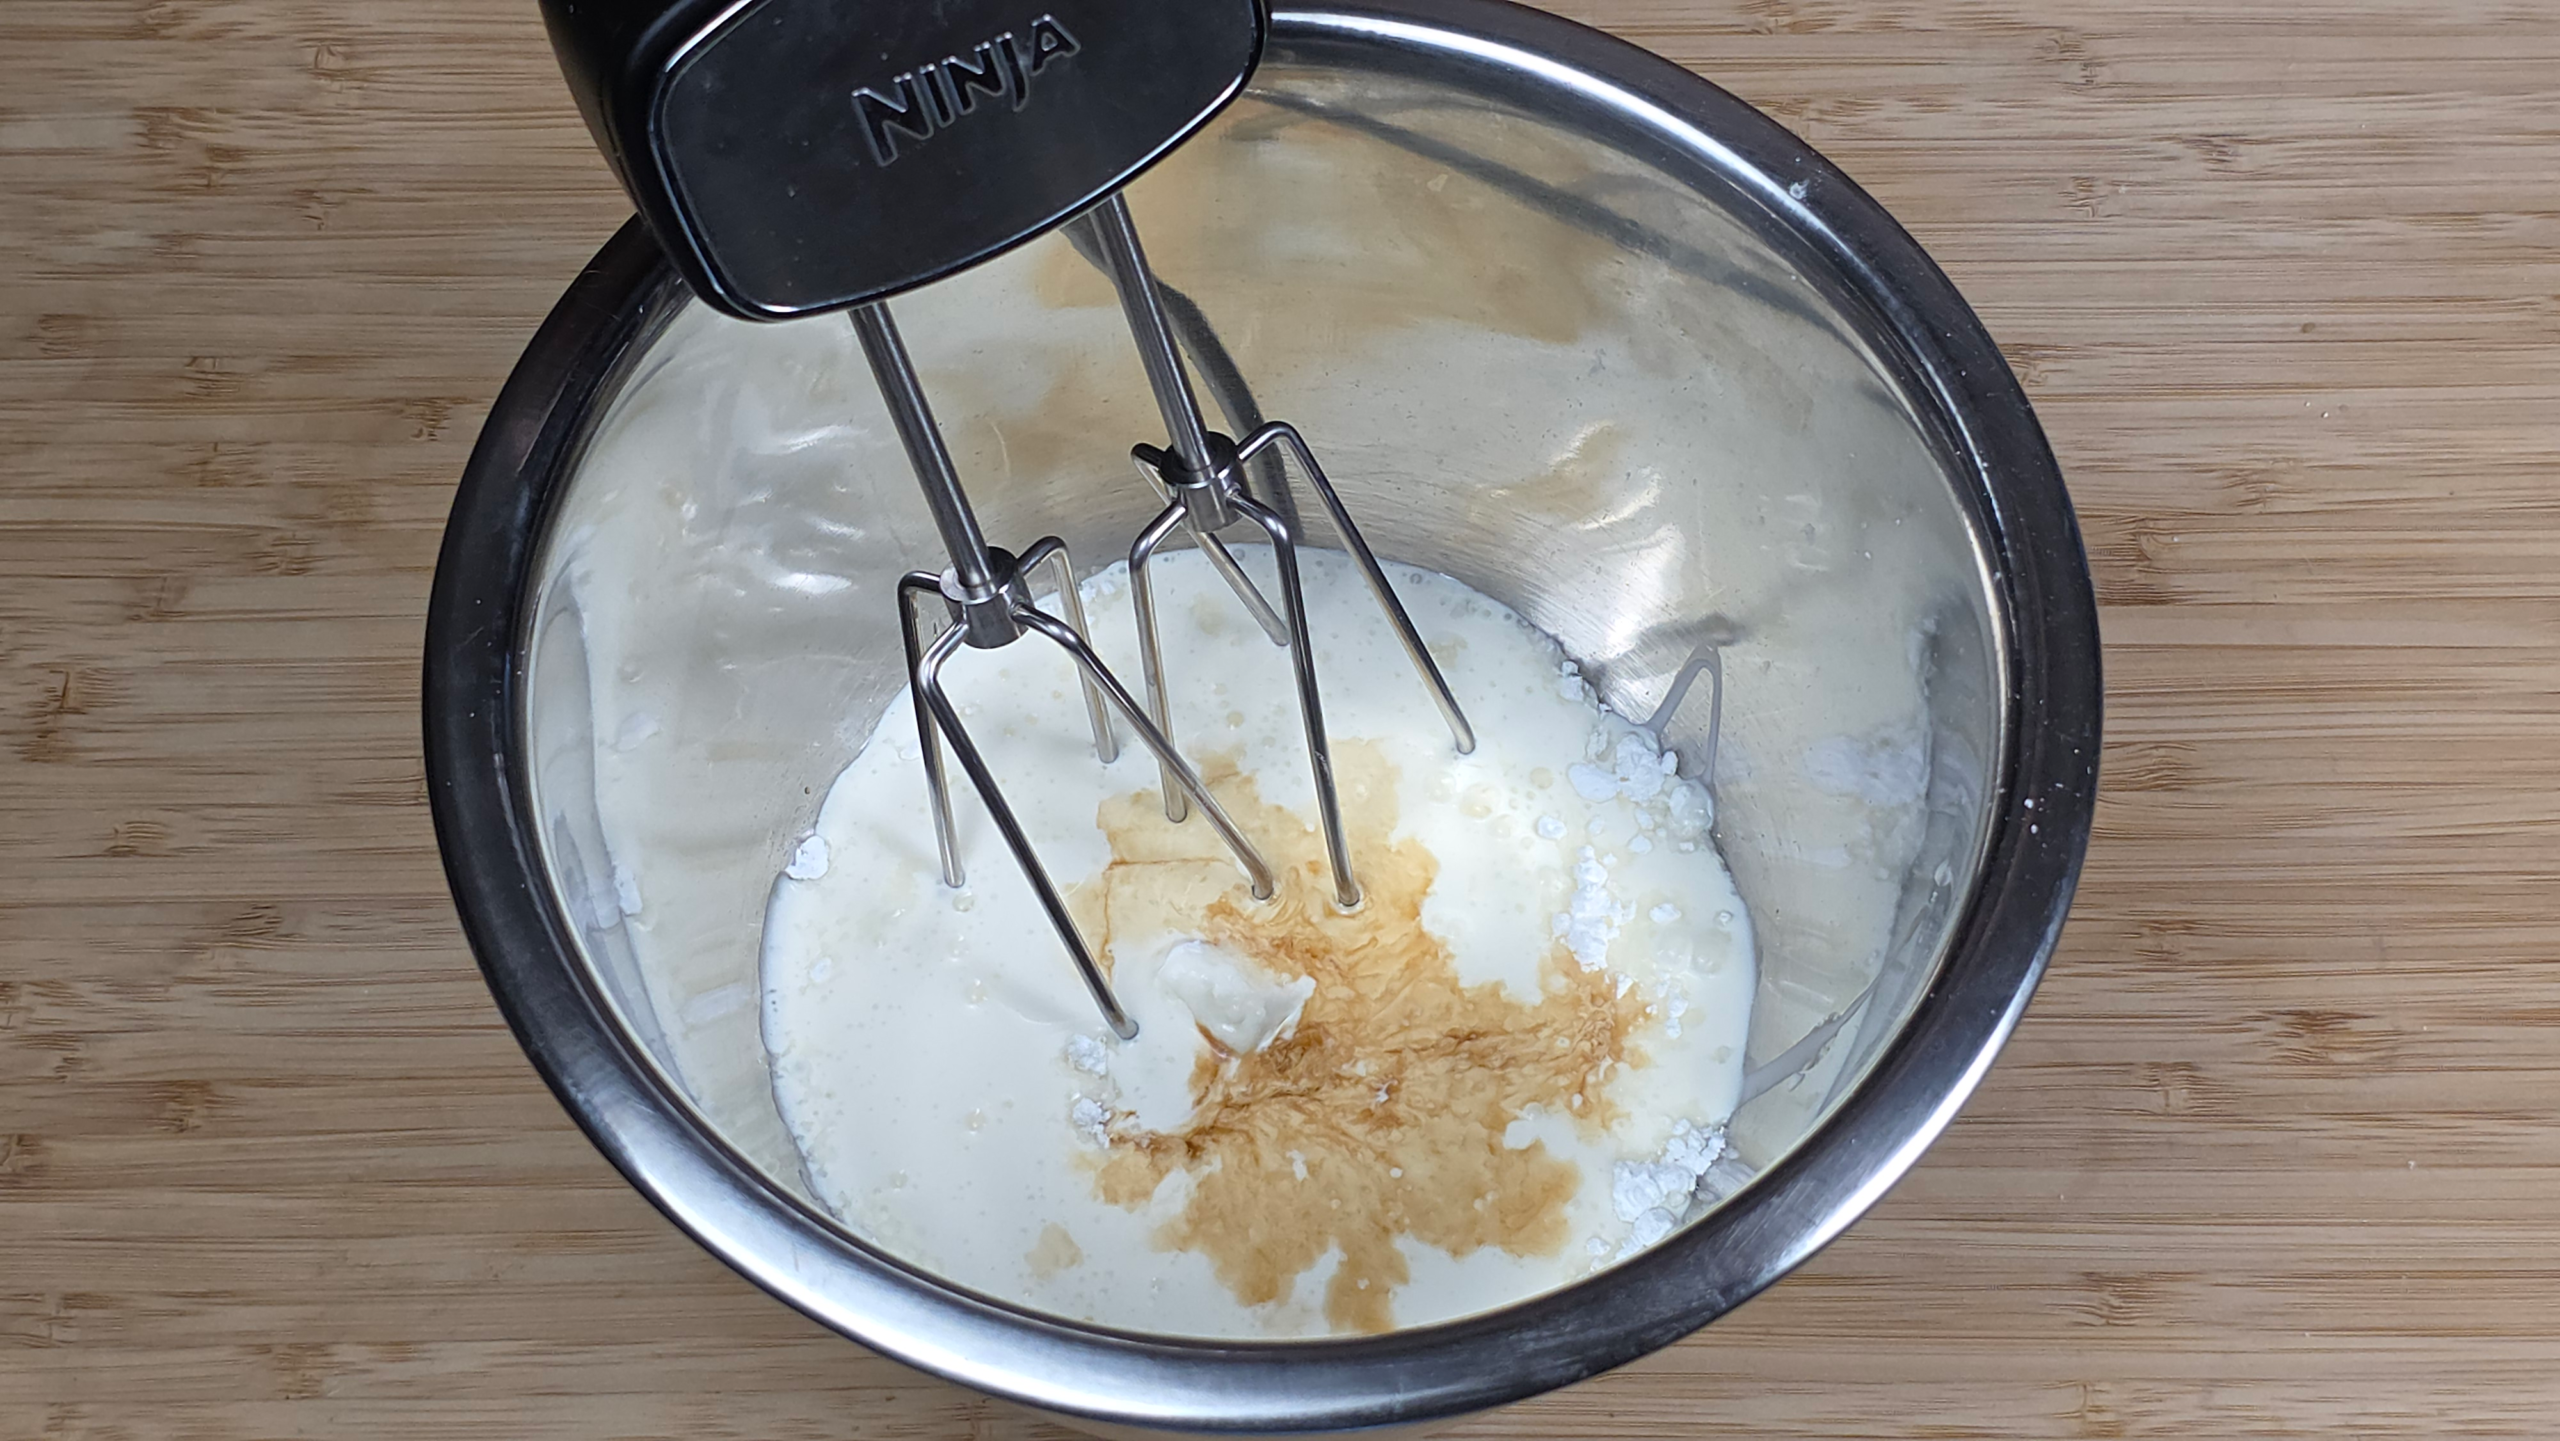
- In 3qt mixing bowl, add heavy whipping cream, 1/2 TSP vanilla extract + powdered sugar
- Mix on medium speed with hand/stand mixer for 2 minutes (or until soft peaks form)