


When we think of Vanilla Pudding, we tend to think of the individual cups with the pudding already made or the Jell-O mixes. The problem with these pudding cups and store-bought mixes is while they are indeed convenient to make, they’re full of artificial dyes and artificial flavor enhancers. That said, believe it or not, it is remarkably easy to make fresh vanilla pudding with all-natural ingredients at home. And the best part of it all? In all likelihood, you likely already have these ingredients in your kitchen cabinets / pantry and your refrigerator. Once you try my rich & creamy recipe, you’ll never want to go back to store-bought pudding again, and I’m happy to share it with you!

Key Ingredients for Vanilla Pudding
Vanilla pudding from scratch is made from your standard ingredients: Thickener, Table Salt, Sugar, Butter and Vanilla Extract. That said, what makes this recipe stand out from the rest is the use of Flour plus Half & Half.
- Half & Half: Most recipes call for using whole milk. The thing with whole milk is that it has water content upwards of 85% to 90%. This poses a couple differences in the vanilla pudding. One, half & half is essentially a combination of whole milk plus heavy cream, and the heavy cream helps to give the pudding a more velvety texture. In addition, the relative lack of water in the half & half helps to give the pudding a richer flavor with even a slight caramelized undertone, giving the banana pudding a somewhat more complex taste. For these reasons, I find using half & half vs. whole milk makes for a better vanilla pudding, which is what my recipe calls for.
- Eggs vs. No Eggs: If you want the cold hard truth about this, there’s really no right or wrong way when it comes to using eggs for vanilla pudding. Traditionally, you would use only use eggs to make a custard, while you would only use a starch (Flour or Cornstarch) to make vanilla pudding. That said, these days, you’ll find many recipes that use both and you’ll even find individuals who use the terms pudding & custard interchangeably (although at their root, they’re both technically different types of food). For my recipe, I opted to exclude eggs entirely. The exclusion of eggs makes this pudding much easier to prepare as you don’t have to micromanage it so much while it cooks to avoid curdling.
- Flour vs. Cornstarch as a Thickener: Both Flour and Cornstarch are commonly used as thickeners because they’re primarily made up of starch. Once you cook the starch, the molecules in the starch while being heated will quickly absorb all of the excess moisture in the dish you’re preparing, which is what helps it to thicken. That said, after doing quite a bit of testing, I prefer to use Flour for this recipe (for a couple reasons). One, because flour tends to contain protein in addition to starch, the ingredients in your pudding can withstand a longer cooking time and are less likely to split (meaning become oily/runny). But also, for that same reason, the added protein in flour helps to make for a thicker pudding.
And lastly, it is true that you don’t have to micromanage eggless vanilla pudding to nearly the same extent as a custard, since you don’t have to worry about eggs scrambling with the heat. However, that doesn’t mean you can leave the pudding alone while it cooks either. If the pudding’s left unattended, you may end up with unevenly cooked clumps of flour that weren’t well-combined or fully dissolved. That’s why I do recommend that you constantly stir the vanilla pudding (although a brisk stir is not required) from the time you start heating it until the time it’s done, as this help ensure any clumps of flour are completely broken up and dissolved.
Tips for Making this Recipe
Be patient. I understand that we all have demanding lives and our time is extremely valuable, so it’s always great when we can find “hacks” that make cooking easier or faster. Unfortunately, this is one of those recipes where there aren’t any real short cuts to the process. I strongly advise against stepping away from the stove while the preparing the pudding, and I strong advise against adjusting the temperature as it cooks. The pot (or saucepan) should be kept at a stable medium heat until it is thick, to ensure the best results. Otherwise, you risk either having uncooked clumps of flour in your pudding or runny pudding. It’ll all be worth it once you taste the vanilla pudding!
Cover the pudding while it cools. Why? Once you’re done cooking the pudding and it cools, as the moisture evaporates from its surface, a layer (which can also be best described as a “membrane”) will form on top. By covering the pudding, that will prevent the moisture from evaporating and thus prevent this layer of skin from forming. That being said, this step is completely optional. Me personally, I opt not to do this (especially because the pudding will only be resting for a few minutes, versus say hours). I would just advise giving the pudding a brisk whisk to break up the membrane and rehydrate the surface of the pudding before you proceed with serving it.
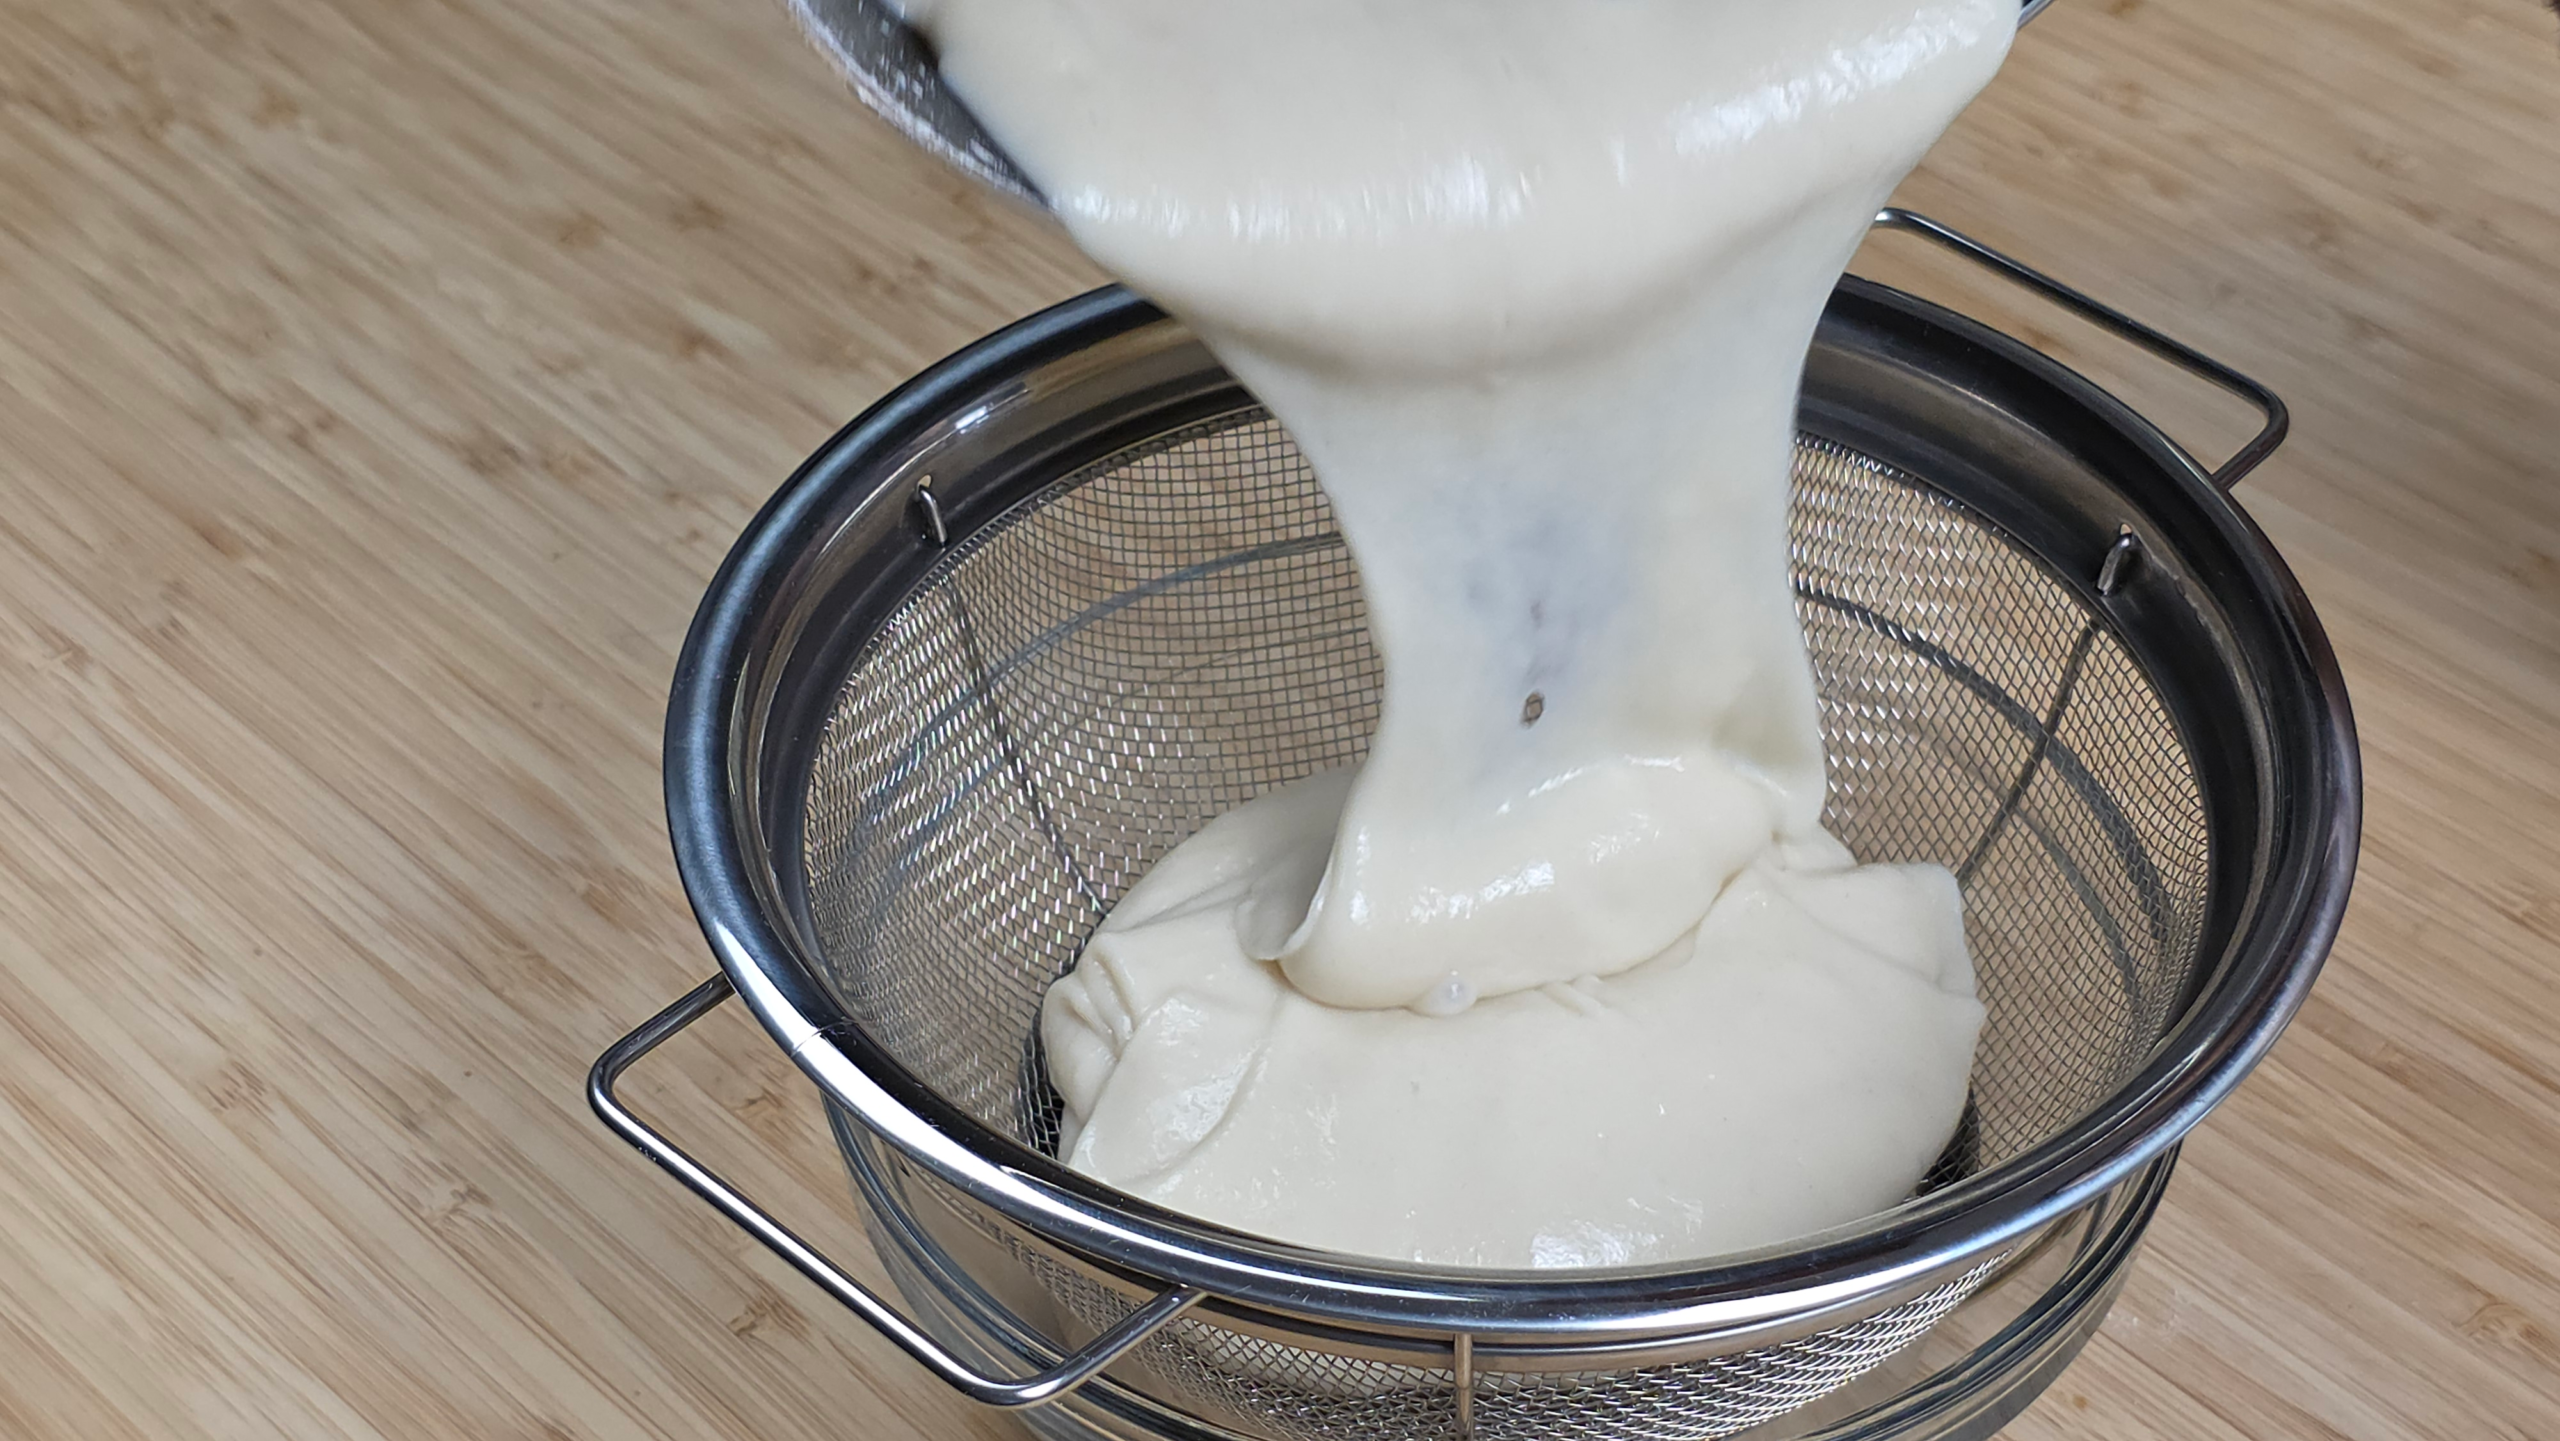
Use a sieve to strain the custard. While this extra step is optional, I strongly recommend (especially if you’re a beginner cook and have never made vanilla pudding from scratch before) straining your pudding through a sieve into a separate bowl before assembling your chocolate pudding. This will be an additional safeguard to ensure you don’t have any lumps of flour or cocoa powder in your final product.
Pudding will chill faster if you separate into serving cups before refrigeration. This is very much an optional step, and I often skip this step as well. That said, if you prefer to enjoy your vanilla pudding chilled (although you can certainly eat this pudding warm if you like as well) and just can’t wait, the pudding will tend to cool much faster if you place it into individual serving cups before you place them in the refrigerator. That said, there’s nothing wrong with simply leaving the pudding in a large bowl until you’re ready to eat it (which is what I do).
Frequently Asked Questions
Can I add toppings to this recipe?
As you can see, per my pictures, I like to add a dollop of whipped cream with crushed vanilla wafers on top of my pudding, in small part for added flavor but mostly for garnish / decoration. The nice part about this pudding recipe is you can pair it with all sorts of toppings. Crushed cookies is another popular topping that people add, but you can also add fruit, graham cracker crumbs or even chopped nuts. It’s best to add these topping right before you’re ready to serve it. One warning with the whipped cream though is that the store-bought whipped cream tends to lack stabilizers, so it will wilt quickly if you don’t get around to eating the pudding fast.
Can I substitute Vanilla Bean Paste for Vanilla Extract?
I don’t recommend it. While typically, you can do a 1:1 substitution between vanilla extract and vanilla bean paste, the problem with vanilla bean paste as it relates to this vanilla pudding recipe is that it’s considerably thicker, in large part because it contains stabilizers such as cornstarch. Conversely, vanilla extract accomplishes two things, Not only does it enhance the flavor of the pudding, but because it’s in liquid form, it provides added moisture to the pudding to ensure it doesn’t become too dense.
Can I substitute Margarine for Butter?
The answer to this question always gets tricky.
While you may be able to replace the butter in this recipe with margarine, there are a couple of caveats that should be kept in mind. One, their fat/water composition is not entirely equal. Typically, margarine will have somewhat more water and somewhat less fat than butter, which could end up negatively affecting the texture of the pudding. In addition, margarine is made using seed oils, which are known to be neutral tasting (meaning they have no flavor). So you will be losing the subtle nuttiness / sweetness in your pudding that butter offers.
All of that said, the short and sweet answer I can give you is I *DON’T* recommend it. For a more detailed answer, see above.
How long can I store the vanilla pudding in the refrigerator?
As long as the vanilla pudding is covered, it should be safe to eat for at least 3 days. After 3 days, it may begin to lose their flavor & texture. Once 5 days have passed, I would advise that you dispose of the vanilla pudding as it may no longer be safe to eat.
Can I freeze this pudding?
I don’t recommend. While it is possible to freeze vanilla pudding, its texture will become much more unappetizing as the ingredients will tend to separate and it will become watery as the pudding thaws. It’s best just to chill it in the refrigerator if you want to keep it cold, and to prepare it fresh.
Try These Other Pudding Recipes

Best Vanilla Pudding From Scratch
Equipment
- 1 Whisk
- 1 Plastic Spatula
- 1 3qt Saucepan
- Measuring Cups/Spoons
- 1 Large Bowl
- 1 Sieve (optional)
Ingredients
- 6 TBSP All-Purpose Flour
- 1/3 Cup White Granulated Sugar
- 1/4 TSP Iodized Salt
- 1 3/4 Cups Half & Half
- 1 TBSP Unsalted Butter (Room Temperature)
- 1 TBSP Vanilla Extract
Instructions
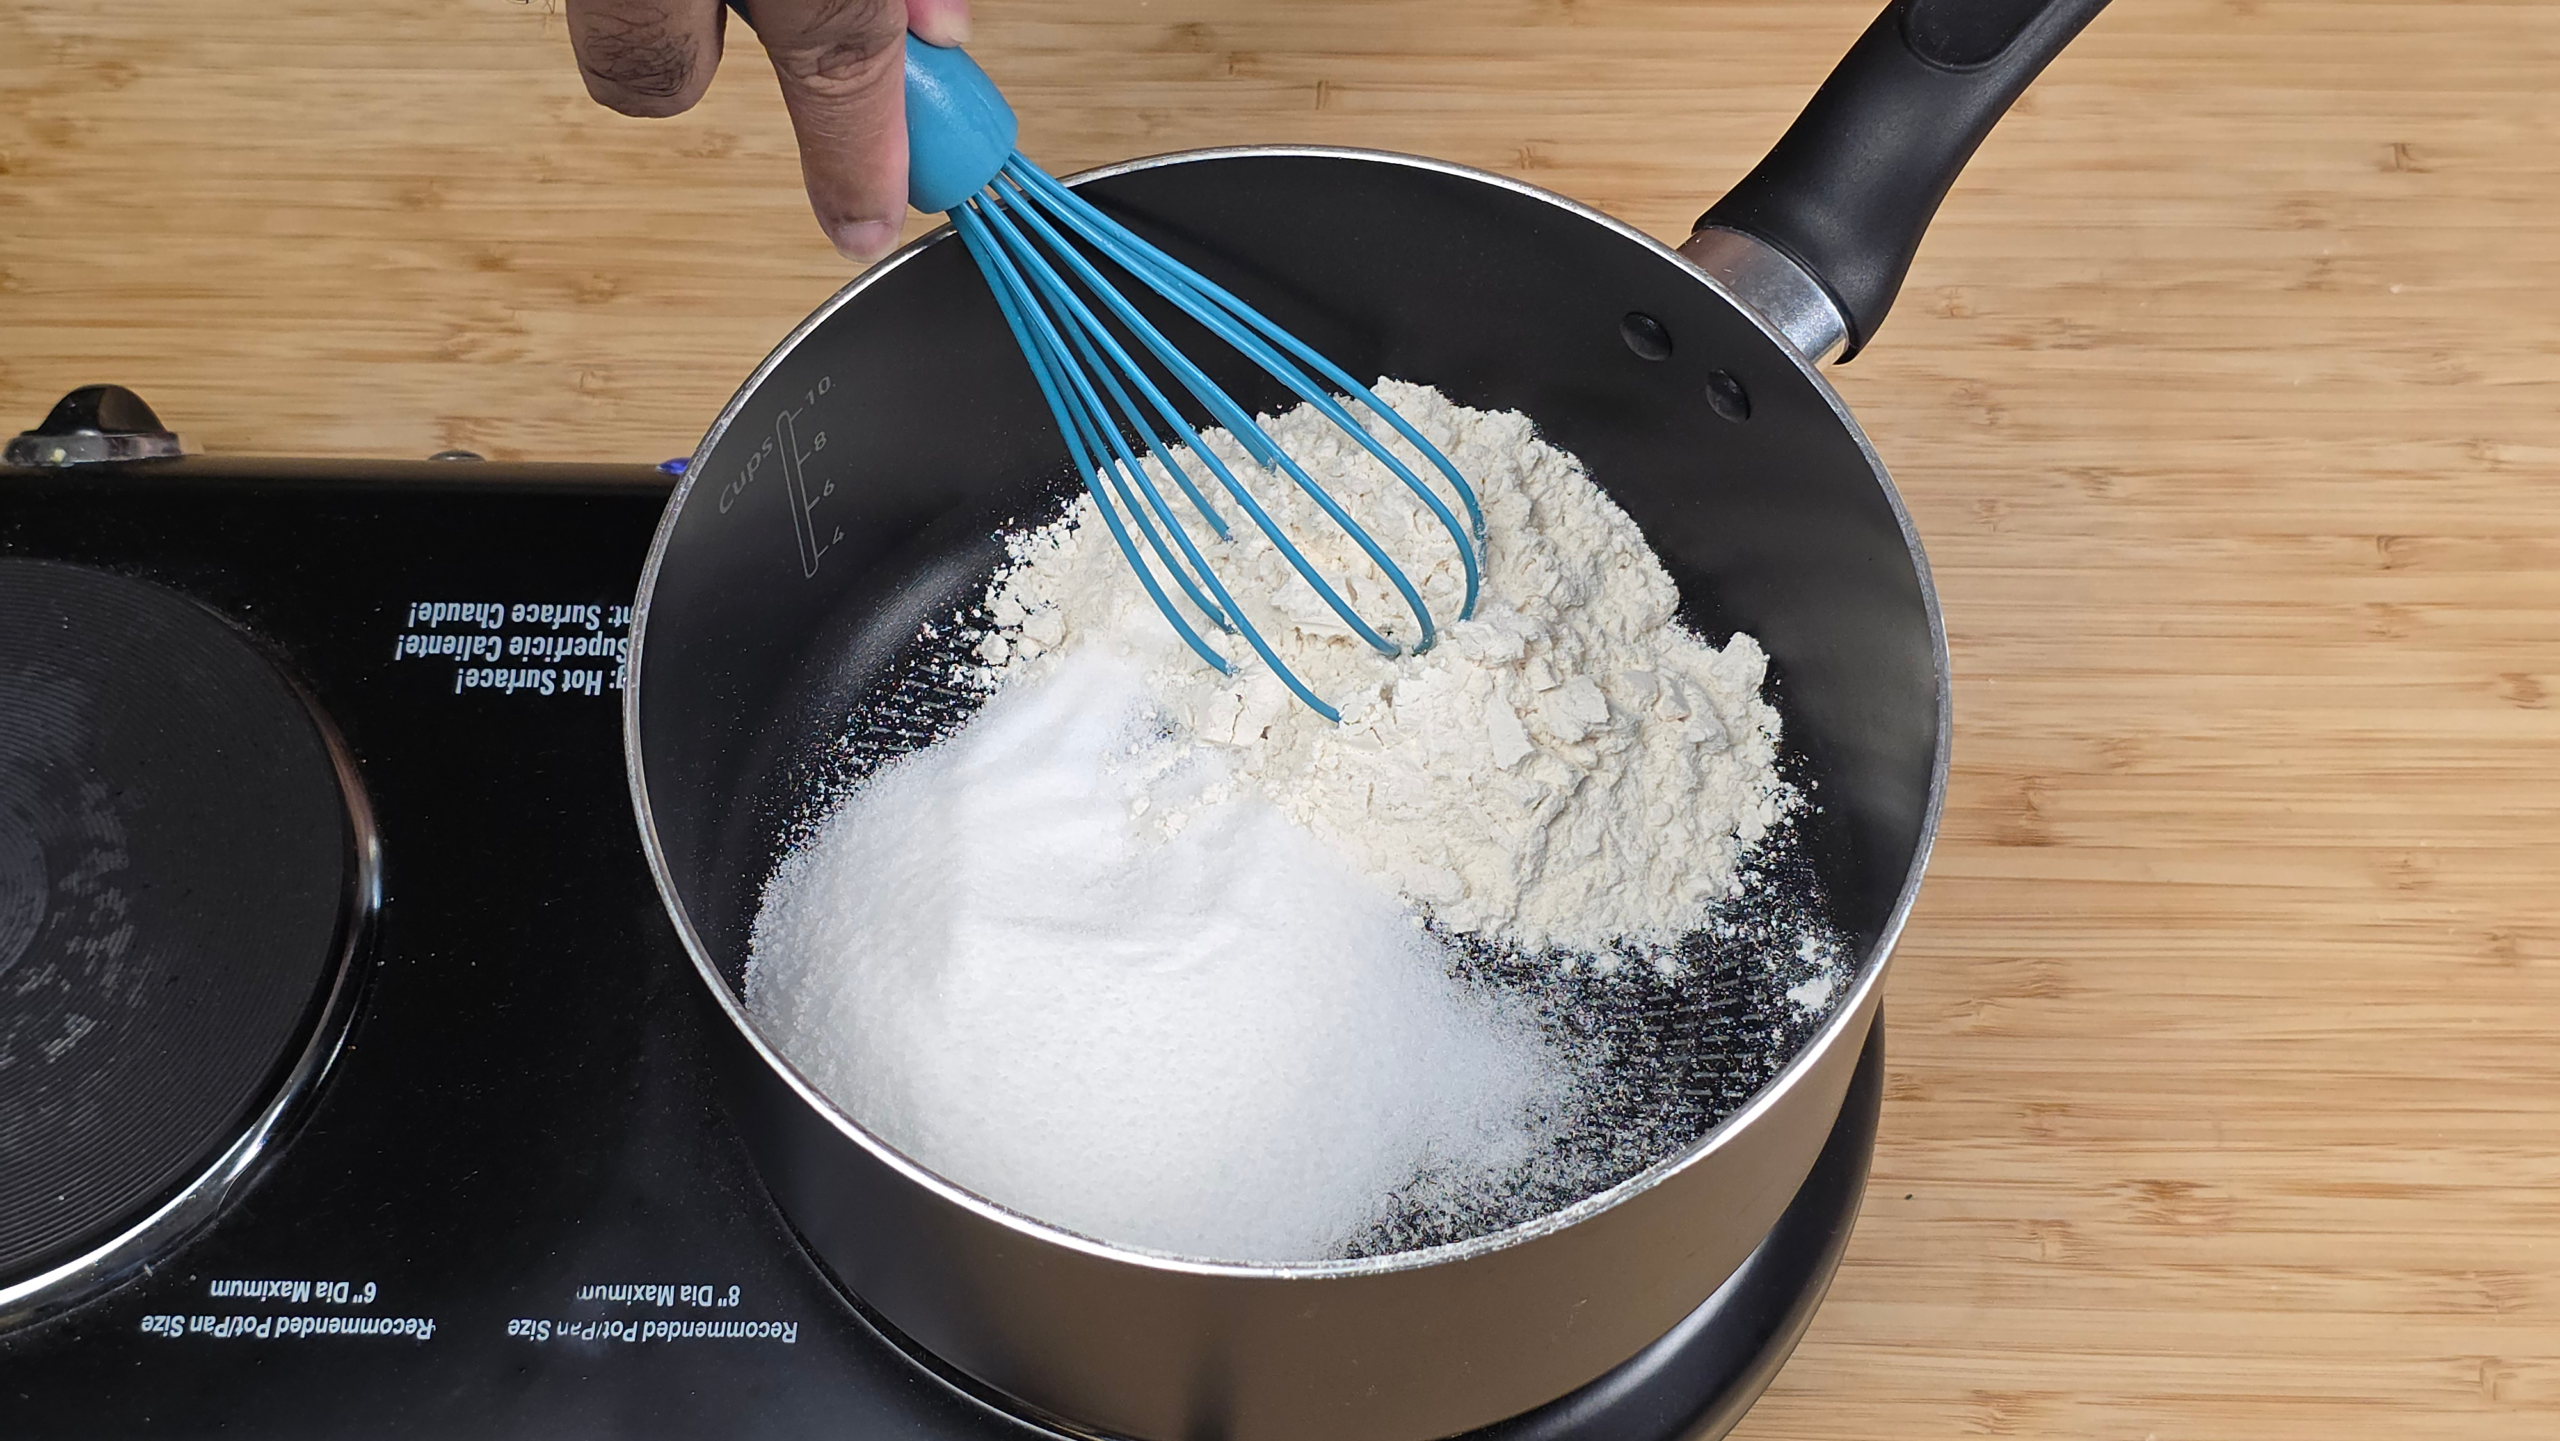
- Add flour, salt, sugar and half + half to cool 3qt saucepan and mix until combined, ensuring few/no clumps.
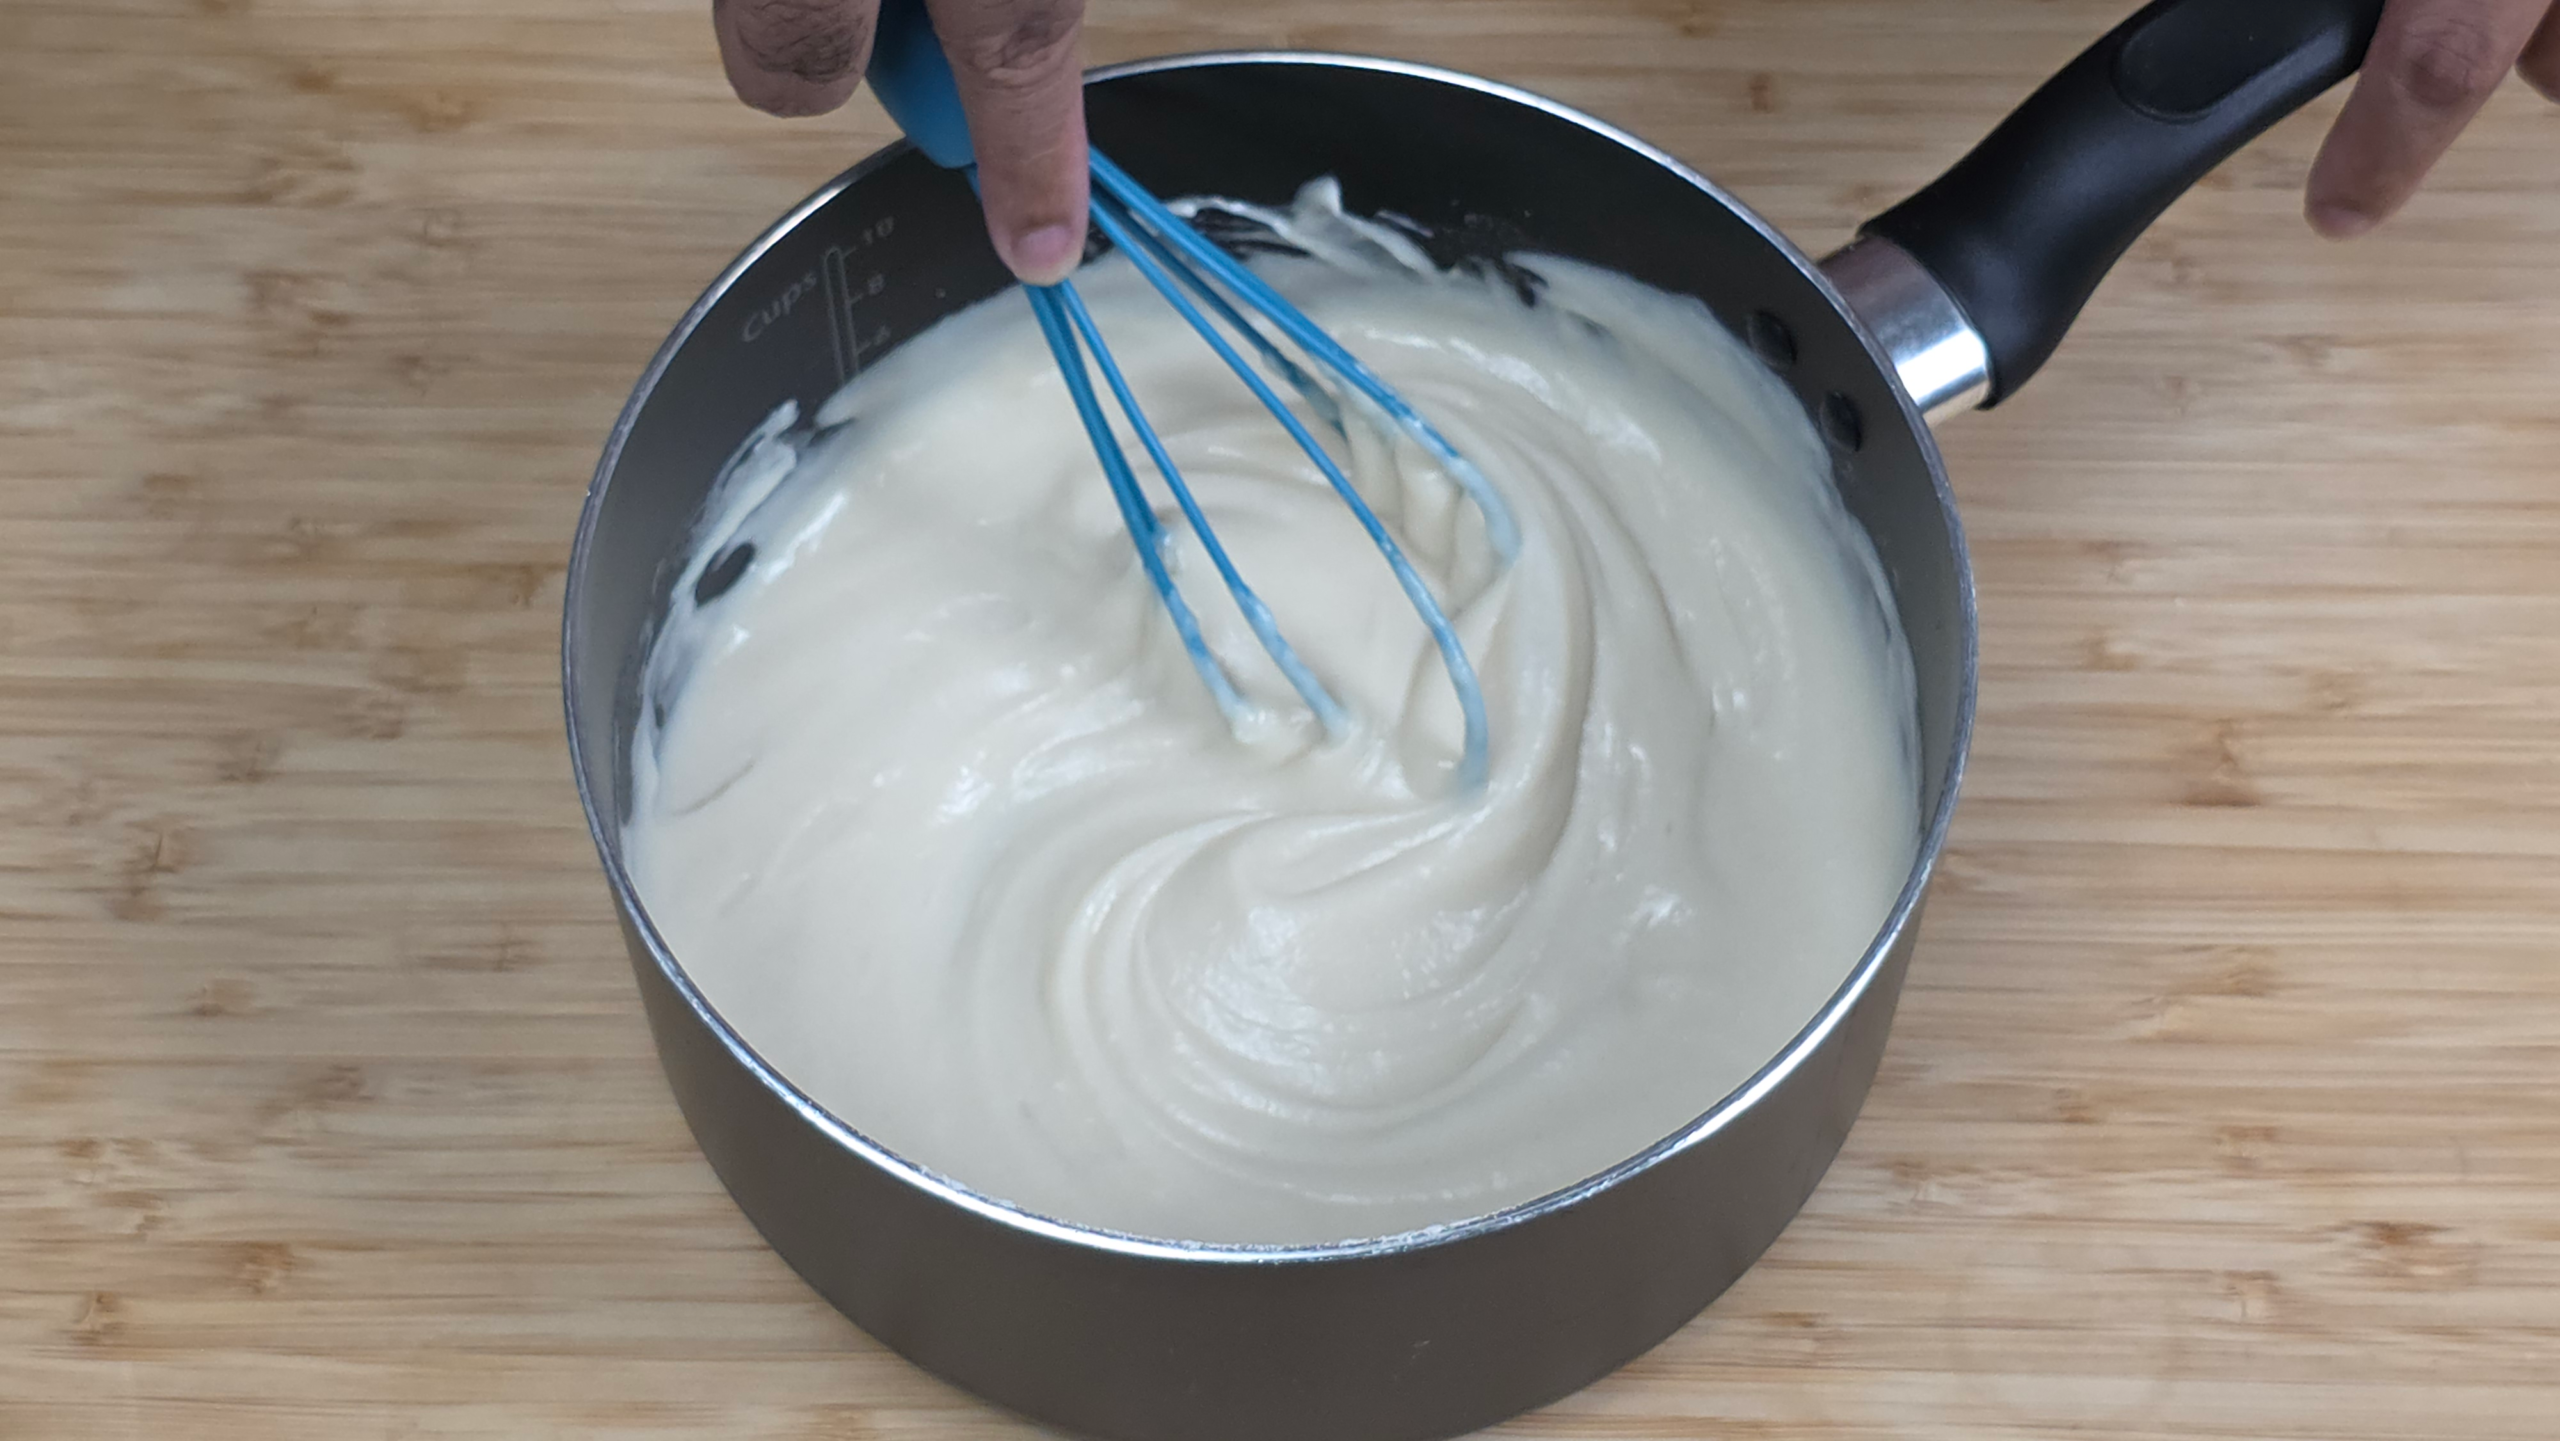
- Warm saucepan on medium heat and constantly stir gently until thickened. On electric stove, this should take approx. 8-10 minutes. Cooking times will vary with gas stove or induction top.
- After approx. 8-10 minutes (or once pudding has thickened), immediately remove from heat.
- Add butter and vanilla extract to pudding then whisk until combined
- Add pudding to large bowl.
- Chill in refrigerator for a minimum of 2 hours.