


Would I go as far as to say I love waffles more than pancakes or french toast? Not exactly. But it’s something about just having good ol’ fashioned waffles every now and then. And while frozen waffles are ok in a pinch, I really must have them made fresh, specifically made entirely from scratch. It’s not even the same if you’re using prepackaged waffle mix to me. My favorite type of waffles, however, would have to be Belgian Waffles. There is the traditional (Belgium) way of making them with yeast, and then there’s the more Americanized way of making them (with Baking Powder). This recipe I’m happy to share will be for Belgian Waffles made the American way.
Key Ingredients for Fluffy Belgian Waffles
These Belgian Waffles are made from your standard ingredients: Flour, Vanilla Extract, Sugar, and Table Salt. That said, what makes this recipe stand out from the rest is the use of Buttermilk and Cornstarch.
- Butter vs. Vegetable Oil: There are some Belgian Waffles recipes that call for using Butter in place of Vegetable Oil, and there are certainly pros with doing this. Perhaps the main pro is that butter gives the waffles a rich and decadent flavor from the milkfat. Conversely, seed oils (such as vegetable oil) tend to be neutral-tasting, thus they don’t really add any flavor to the waffles. That being said, most recipes (including this one) will call for using vegetable oil instead of butter. The reason why is since vegetable oil contains very little water (vs. Butter which has a roughly 20% water content), the waffles have a much easier time browning evenly as they cook, giving them their pretty color.
- Cornstarch: Why? For a few reasons. The cornstarch helps to soften the protein in the flour, which limits the development of gluten and keeps the Belgian Waffles tender as they bake. In addition, cornstarch does a great job at absorbing and holding liquid that would otherwise evaporate during the cooking process, which helps keep the inside of waffles moist while subsequently preventing the exterior of waffles from becoming soggy, thus contributing to their crispy crust. And the best part about cornstarch? Despite what the name implies, cornstarch is favorless with virtually no distinctive taste, so you don’t have to worry about your waffles tasting like corn.
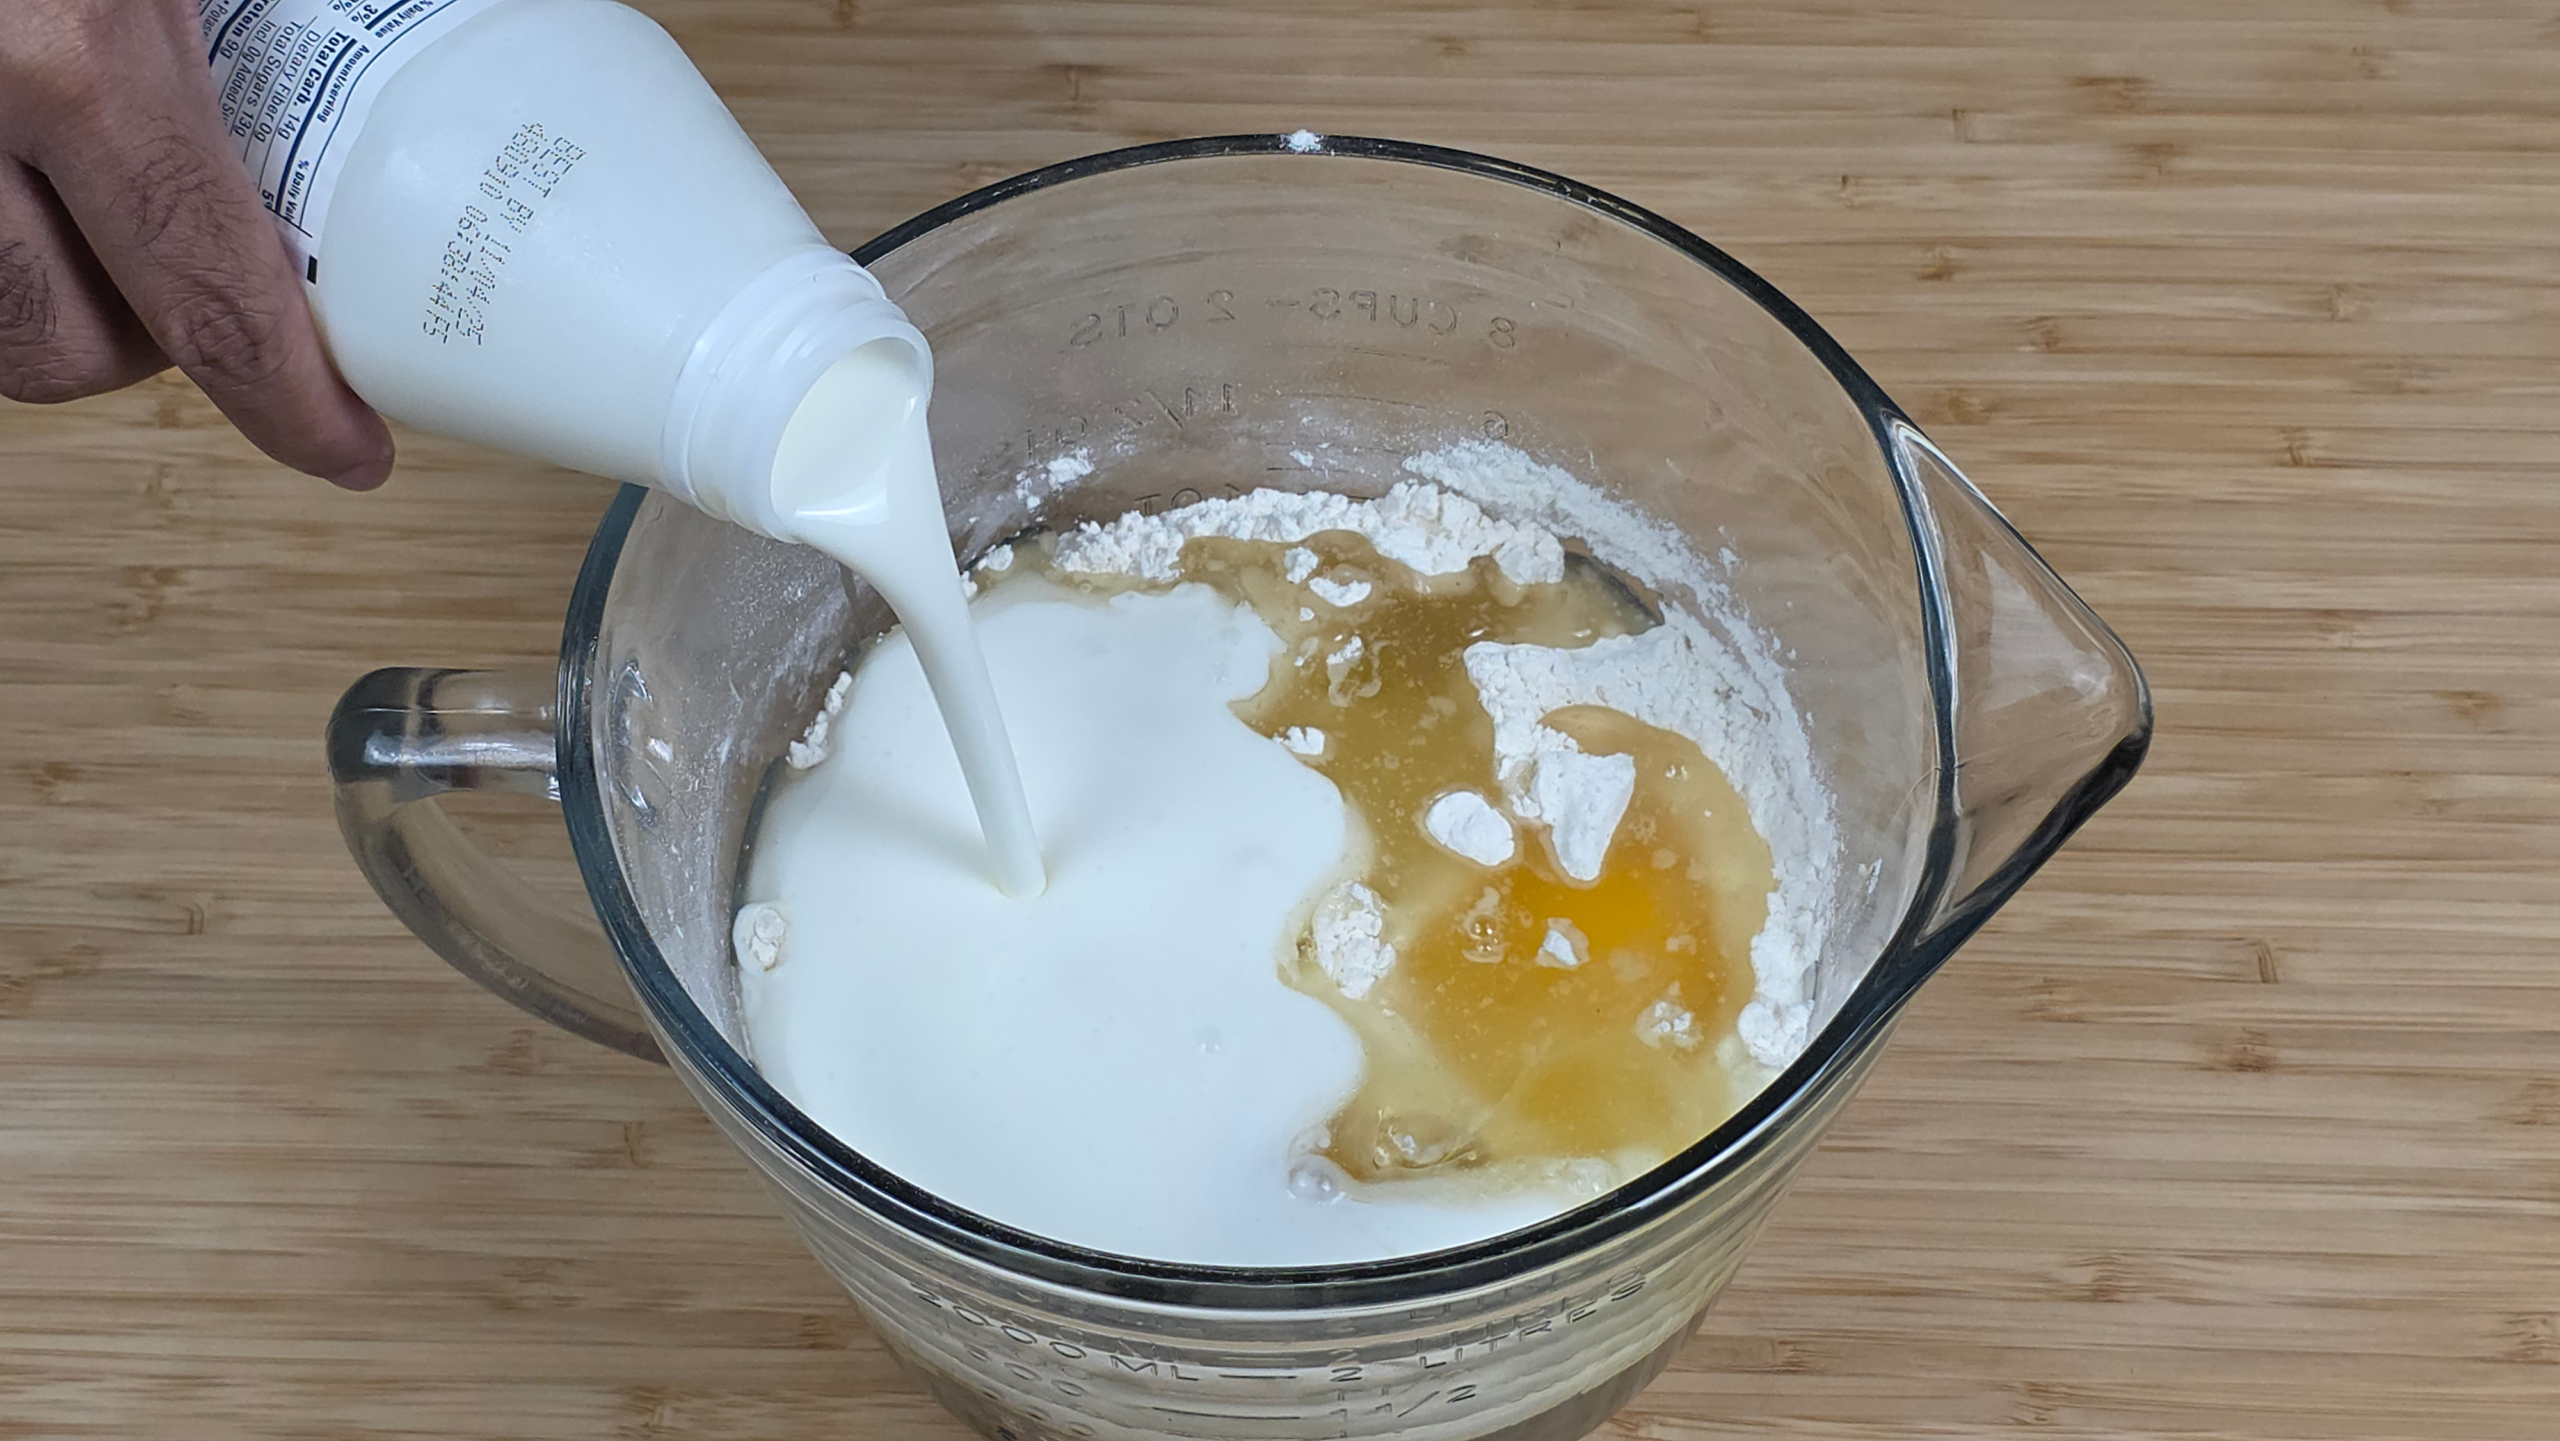
- Buttermilk: While there’s nothing wrong with using whole milk when making Belgian Waffles, I prefer to use buttermilk in this recipe as it gives the best end results. the biggest drawback with whole milk is because it’s lacking the acidic component that is found in buttermilk, it doesn’t really give the Belgian that airy texture that it’s known for when the buttermilk reacts with the baking soda in the waffle batter. Ultimately, the whole milk ends up making for a much denser waffle. Also for what little it’s worth, buttermilk is somewhat healthier than whole milk because of its lower fat content (after all of the bacon fat we’re using, any little bit we can reduce elsewhere counts!)
- 2 Eggs vs. 3 Eggs: Eggs are an ingredient that do a number of thing in any Belgian Waffle recipe. For one, eggs are considered a emulsifier (which is a fancy word for binder), as they help to ensure all of the ingredients remain bound together and don’t “split” (or separate) when mixing them together or during the cooking step. But the other important thing eggs do is provide additional moisture. I tested out this recipe with 2 Extra Large Egg as well as 3 Extra Large Eggs. Ultimately, I found that add 2 Extra Large Eggs led to a much dryer and denser waffle, which is why I ultimately settled on using 3 Extra Large Eggs instead.
- Baking Soda vs. Baking Powder: You’ll find that many recipes will only use baking powder for Belgian Waffles, which can be perfectly fine. But I opted to use both for a few reasons. For one, the gas bubbles from when the baking soda dissolves help to keep the gluten in the flour from coagulating too soon, which gives the fat in the batter more time to caramelize (this will help to give the cornbread a more picturesque brown color). Also, the baking soda will act to neutralize the strong tangy flavor in the buttermilk (which will be discussed below). Furthermore, using both baking and baking powder gives the waffles an extra bit of lift, so that it’s not as flat.
And lastly, there’s one more thing I can’t stress enough. These Belgian Waffles is highly sensitive to the proportion of fat vs protein (I.E. flour and egg whites) that is used. Even being off by a mere tablespoon can completely change the shape, texture and flavor. That said, I strongly advise that you use a spoon to gather your flour and even level off the top of the measuring cup with a knife. If you scoop out the flour with the cup itself, you risk packing way more flour into the cup (and eventually the dough) than what is required, thus they won’t bake properly. Weighing your flour with a bowl and kitchen scale is also a perfectly fine option.
Tips for Making this Recipe
Ensure baking powder is fresh. You should always be mindful of the expiration date on your baking powder before you put it to use. Perhaps the biggest issue people encounter when they’re making Belgian Waffles is that they’re using extremely old baking powder. While most brands of baking powder can remain active for months or even years, because many people don’t use it often, it can end up sitting in the cabinet and before you know it, the expiration date is in the past. When this happens, the waffles will fail to rise properly in the oven because it is no longer active. That’s why you should always ensure your baking powder has not expired.
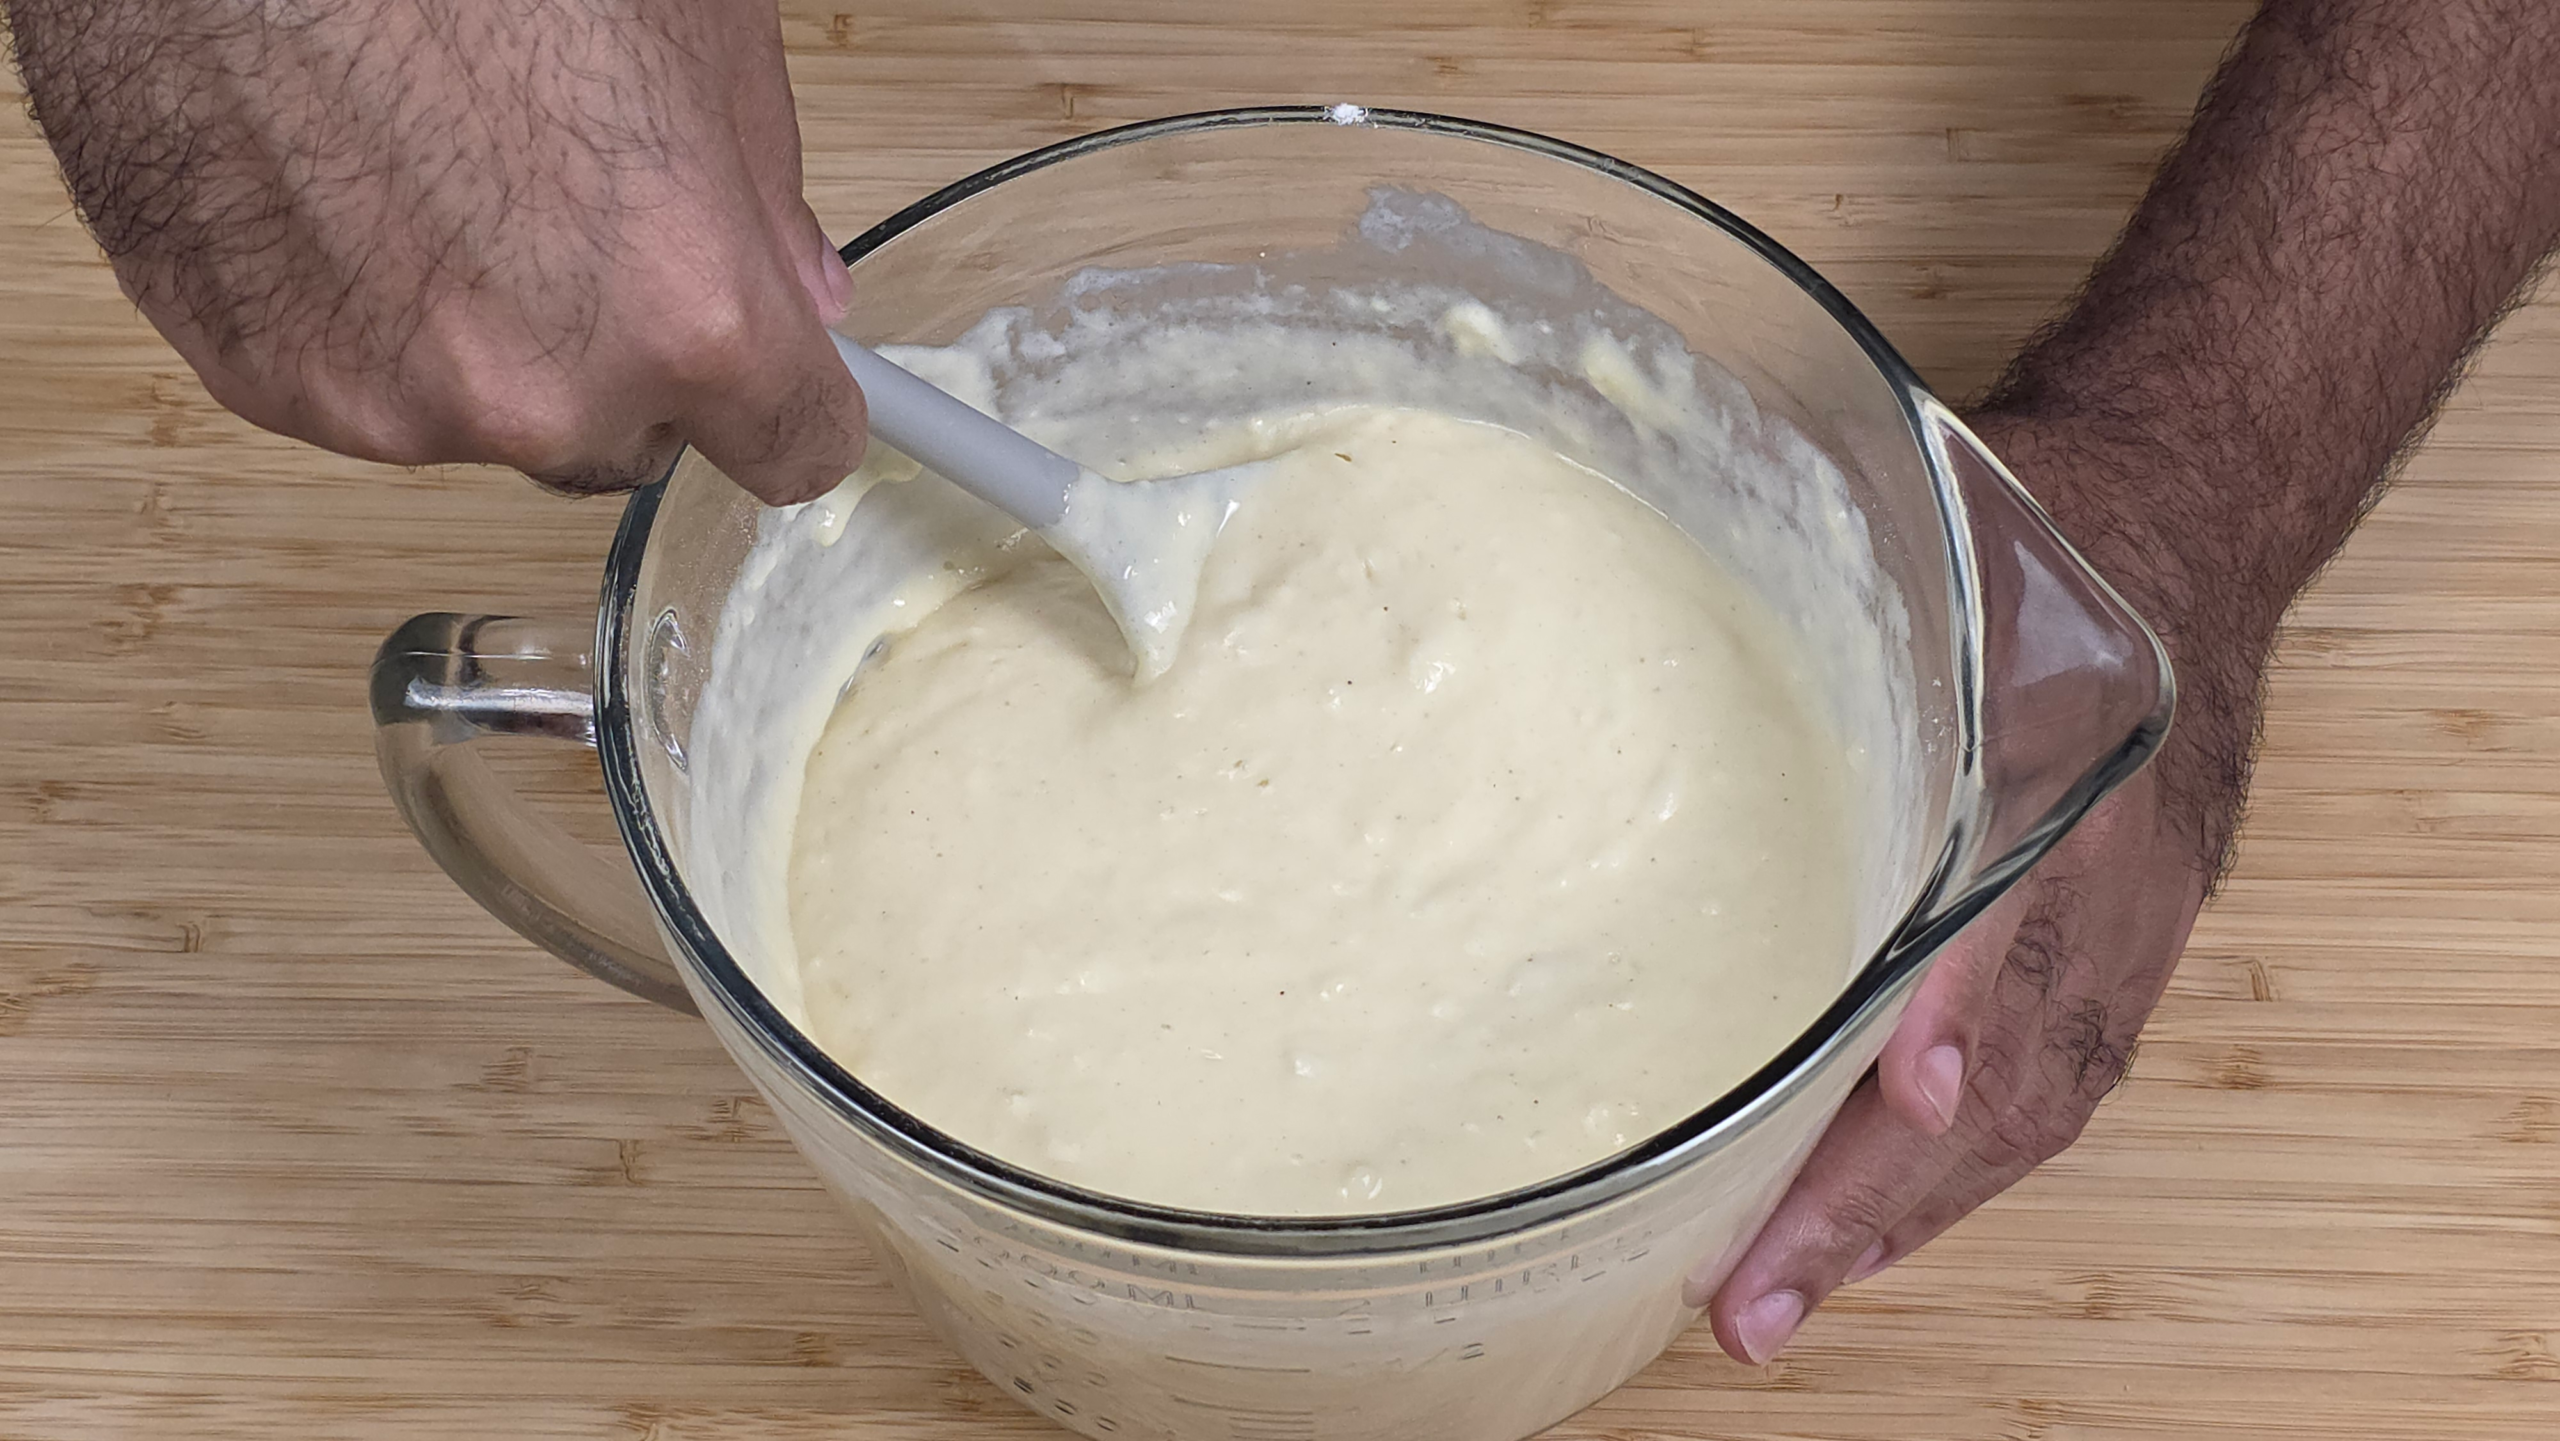
Do not overmix the dough. You have to be really careful when you’re combining all of the ingredients for these Belgian Waffles (and baked goods in general). The reason why is because the flour tends to contain a fair amount of protein, and that protein can lead to gluten formation when combined with water (which is included in the buttermilk). Ultimately, you only want to mix the wet and dry ingredients until they’re just combined, meaning until the flour is no longer visible to the naked eye. I recommend using a cooking spoon or plastic spatula for this, and avoid using a whisk or hand/stand mixer.
Allow the batter to rest before placing in the oven. Once all of the ingredients have been combined, I recommend allowing the batter to rest for at least 10 minutes. This will accomplish a couple things. One, this will give the flour time to absorb the moisture, which will contribute to a more tender and less gritty texture. Also, the baking powder will have more time to react with the added liquid, which will give the Belgian Waffles even greater lift while it’s baking. Be careful not to let it rest for too long though, because then you’ll end up with batter that is too thick and it won’t cook properly.
Keep the cooked waffles warm in the oven. For those who have yet to master the art of cooking all of your food at the same time, or for those who may not be ready to eat immediately, it’s never fun having to eat cooled-off food that should be enjoyed hot. That said, something you can do with help prevent this from happening is by preheating your conventional oven to 200*F (93*C) and then placing the finished Belgian Waffles inside the oven until you’re ready to eat or serve it. Be careful not to abuse this though, as keeping the belgian waffles in the oven for too long will cause the hot and arid air to dry it out.
Frequently Asked Questions
Can you add Nuts or Chocolate Chips to this recipe?
I’m personally not a fan of having these extra ingredients in my Belgian Waffles (personal preference), which is why I officially excluded them from my recipe. That being said, if you prefer having these items in your belgian waffles, you can certainly add them while combining the ingredients.
Can I top my Belgian Waffles with fruit or whipped cream?
Absolutely! I personally can take or leave having these extra ingredients on top of my Belgian Waffles, which is why I officially excluded them from my recipe. That being said, if you prefer having these extra items as toppings on your Belgian Waffles, you can certainly add them once the waffles are done cooking and you’re ready to eat/serve them.
Can you freeze the Belgian Waffles? And if so, for how long?
You can definitely freeze these Belgian Waffles! Once they’ve cooled completely, for the best results, place them in an airtight freezer bag or container. They should maintain their freshness for at least 3 months. While they may still be safe ton eat beyond 3 months in the freeze, the waffles will gradually lose their flavor and texture after 3 month has passed. You can then reheat them in the oven for 10 minutes at 350*F.
Many recipes require that you separate the egg whites and whip them. Is that required?
In my humble opinion, going through the trouble of separating and whipping egg whites is an unnecessary extra step, especially when you’re trying to work relatively quickly to eat/serve breakfast. With this specific recipe, as long as you’re using the vegetable and cornstarch as directed, along with using a high quality belgian waffle maker, you will get waffles with a crispy exterior.
Try These Other Breakfast Recipes

Easy Belgian Waffles
Equipment
- 1 Whisk
- 1 Cooking Spoon
- 1 Large Mixing Bowl w/ Spout
- Oil / Cooking Spray (to grease pan / skillet)
- Measuring Cups/Spoons
- Belgian Wafle Iron
- 1 Tongs
Ingredients
- 2.5 Cup All-Purpose Flour
- 1/4 Cup Cornstarch
- 1/4 Cup White Granulated Sugar
- 1 TSP Vanilla Extract
- 1/4 TSP Nutmeg
- 2 1/4 Cup Buttermilk
- 2 TSP Baking Powder
- 1/2 TSP Iodized Salt
- 1/2 TSP Baking Soda
- 1/2 Cup Vegetable Oil
- 3 Extra Large Eggs
Instructions
- In large mixing bowl, add dry ingredients (Flour, Cornstarch, Sugar, Nutmeg, Salt, Baking Powder and Baking Soda) and whisk until combined.
- Add wet ingredients (Buttermilk, Vegetable Oil, Vanilla Extract and Eggs) to bowl with dry ingredients and mix until just combined.
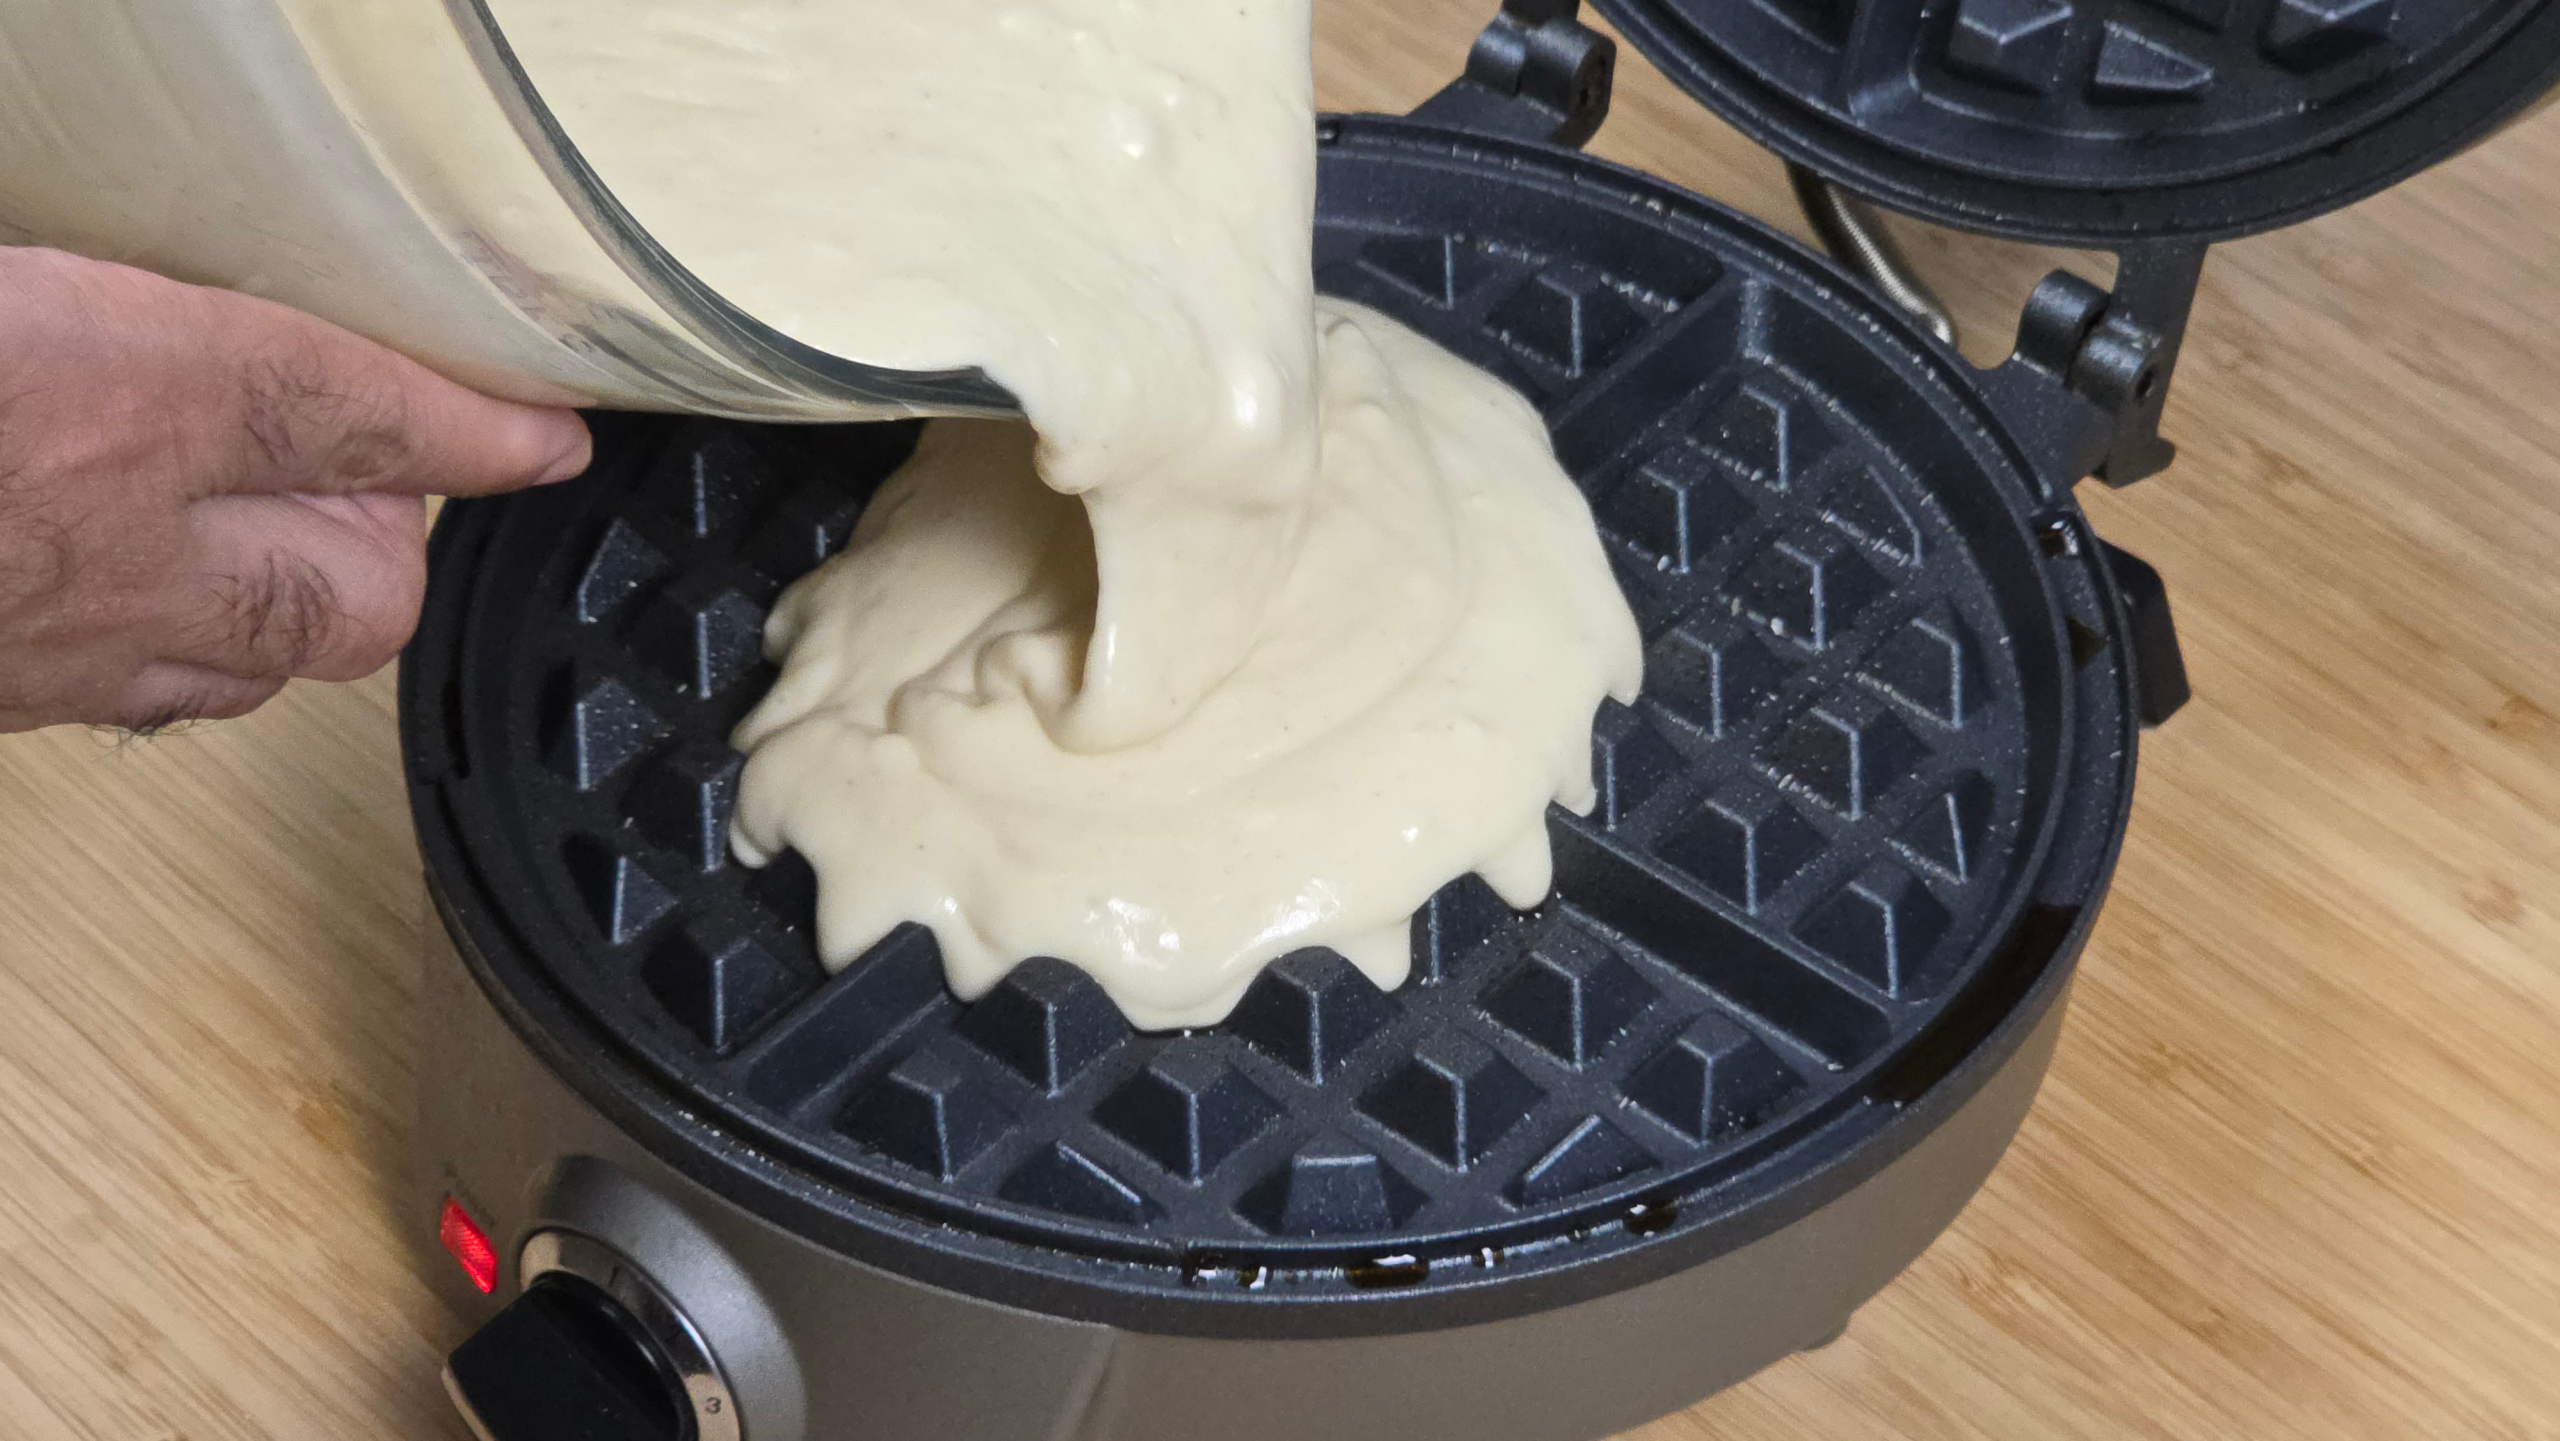
- Preheat waffle iron on desired setting (use setting #4 for best results) and close the iron. Depending on model, an red indicator light may come up
- Depending on model, once waffle iron is ready, the red indicator light will cut off or turn green, and you will hear a beeping sound. Open and iron and slowly pour batter into bottom part of iron.
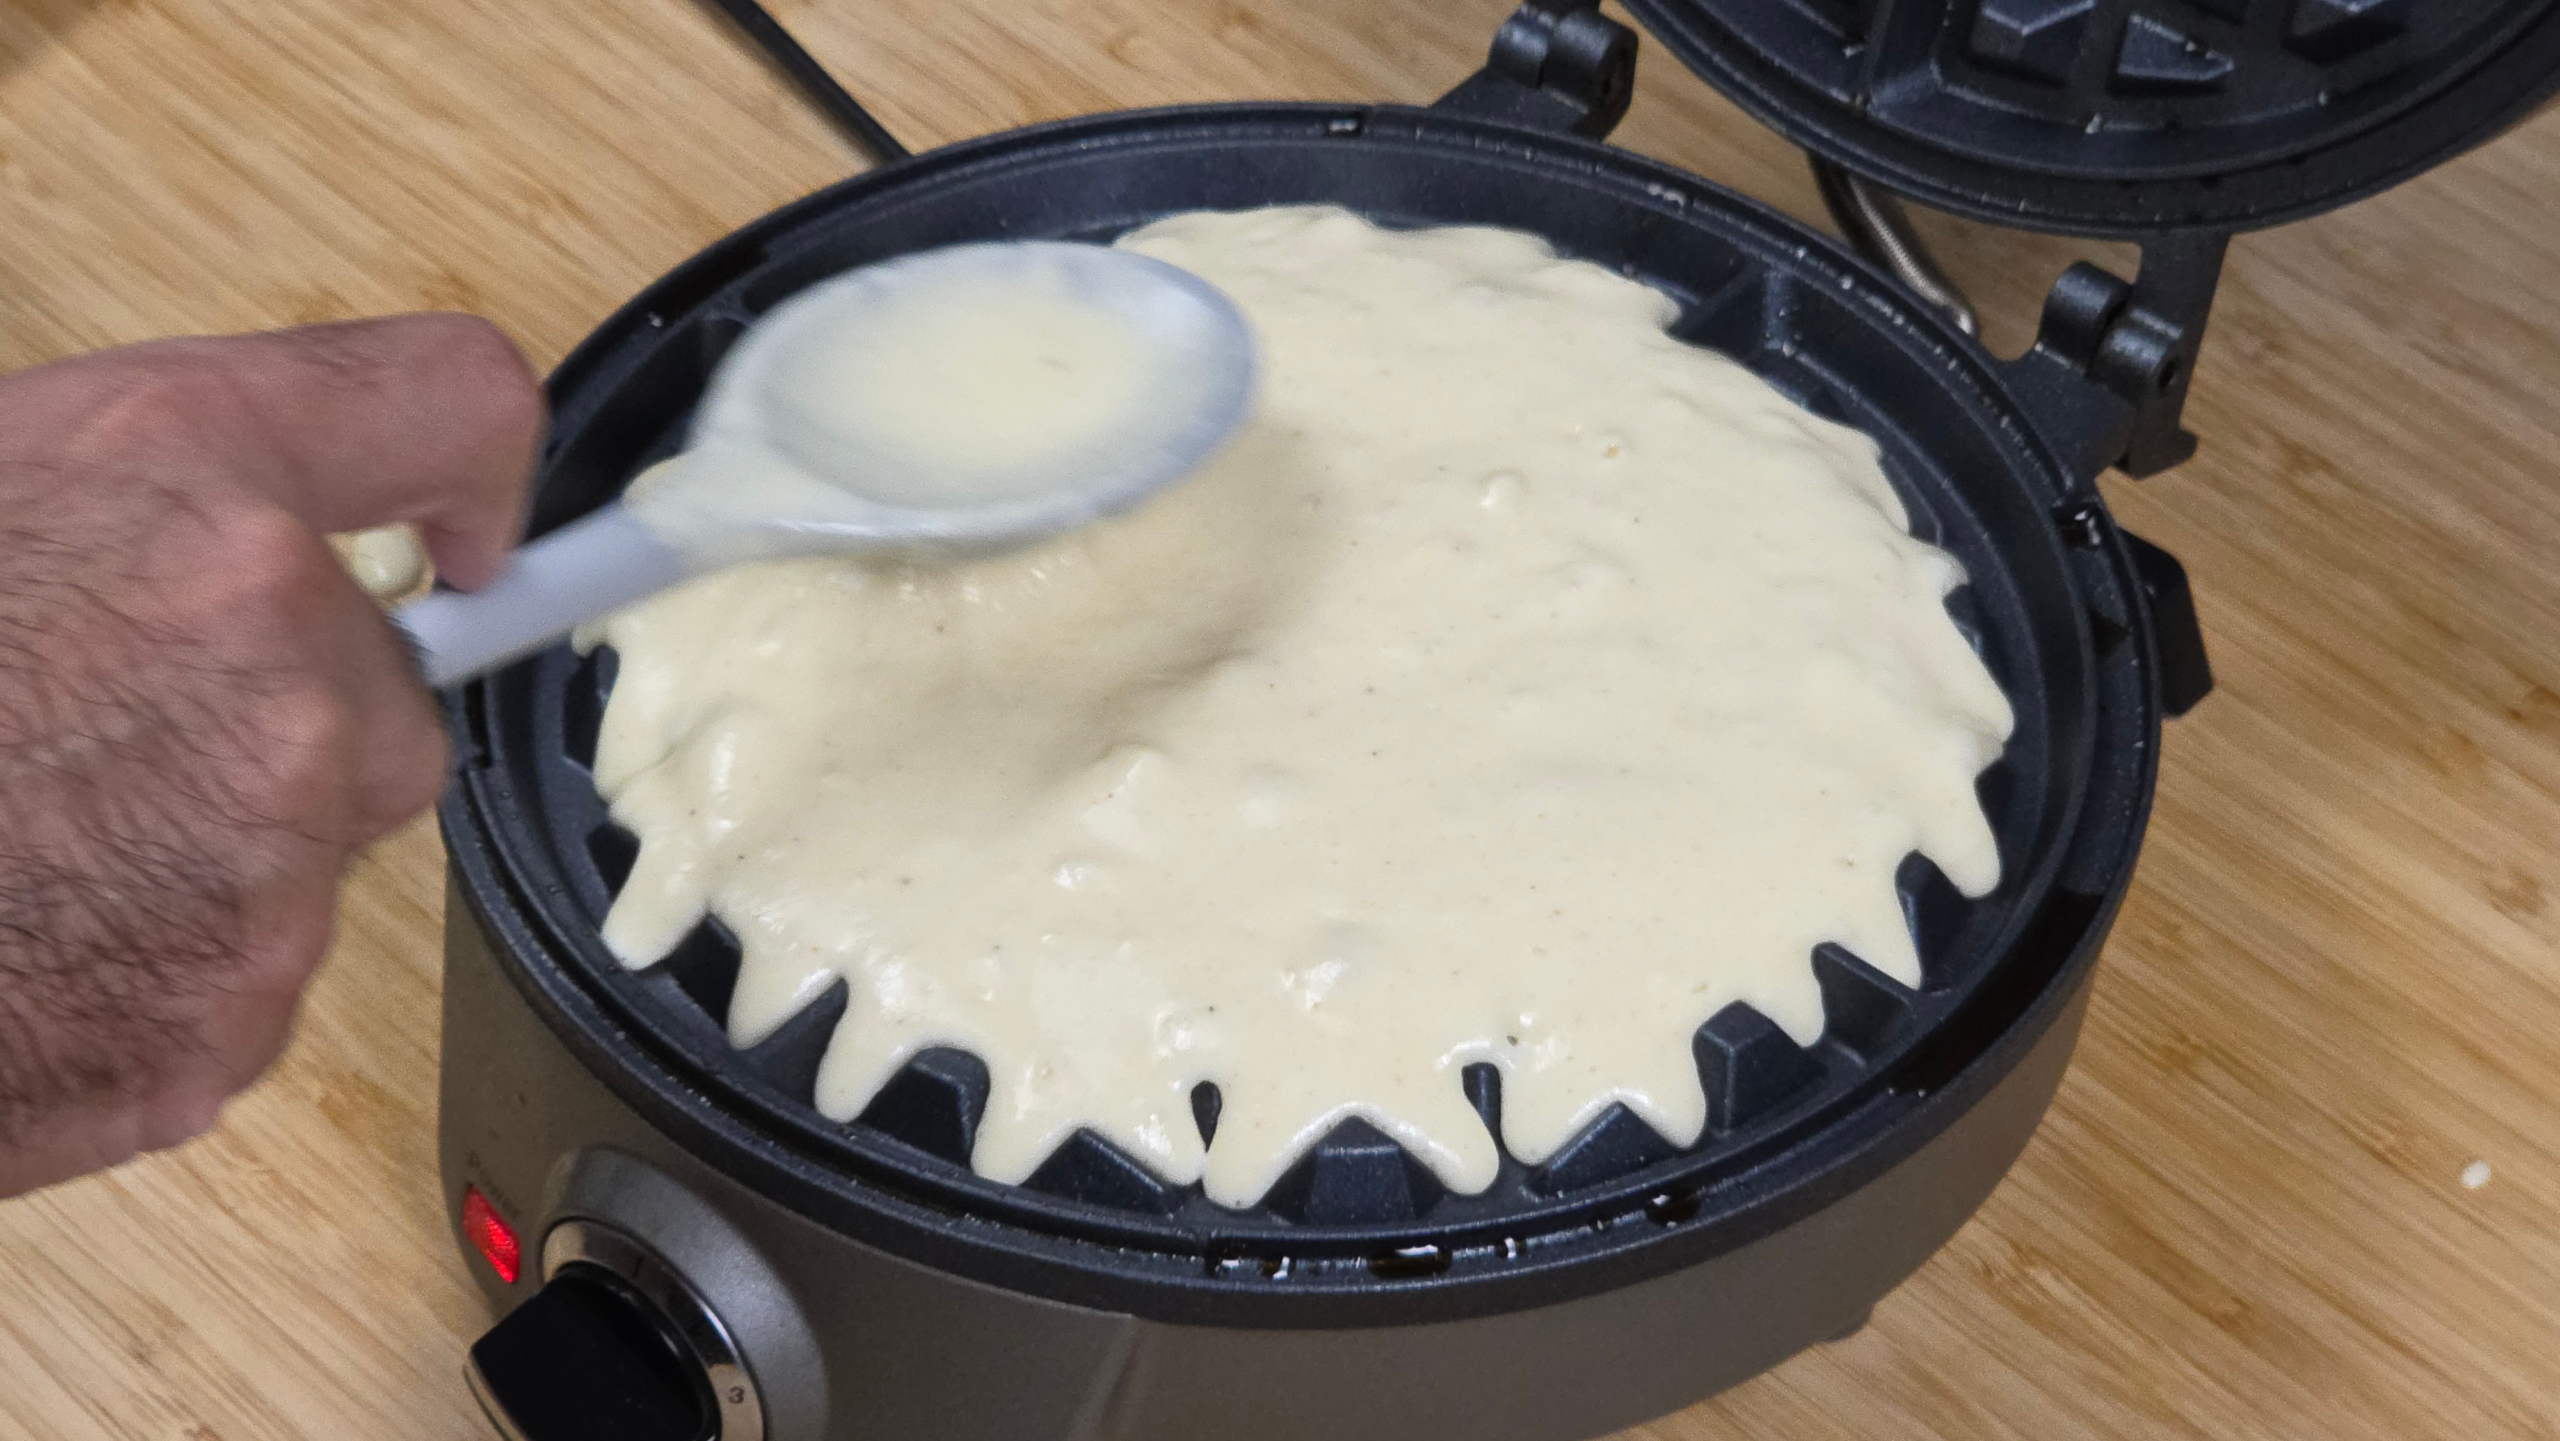
- Use cooking spoon or another cooking tool to ensure batter is evenly spread around in the batter.
- Lower the top of the batter and allow the batter to cook undisturbed.
- Depending on model, once the waffle is ready, the green indicator light will pop on and you'll hear a beeping sound. Alternatively, wait for the steam to completely subside.
- Lift top of waffle iron and carefully remove waffle with tongs, then repeat steps until all of the batter is gone.