


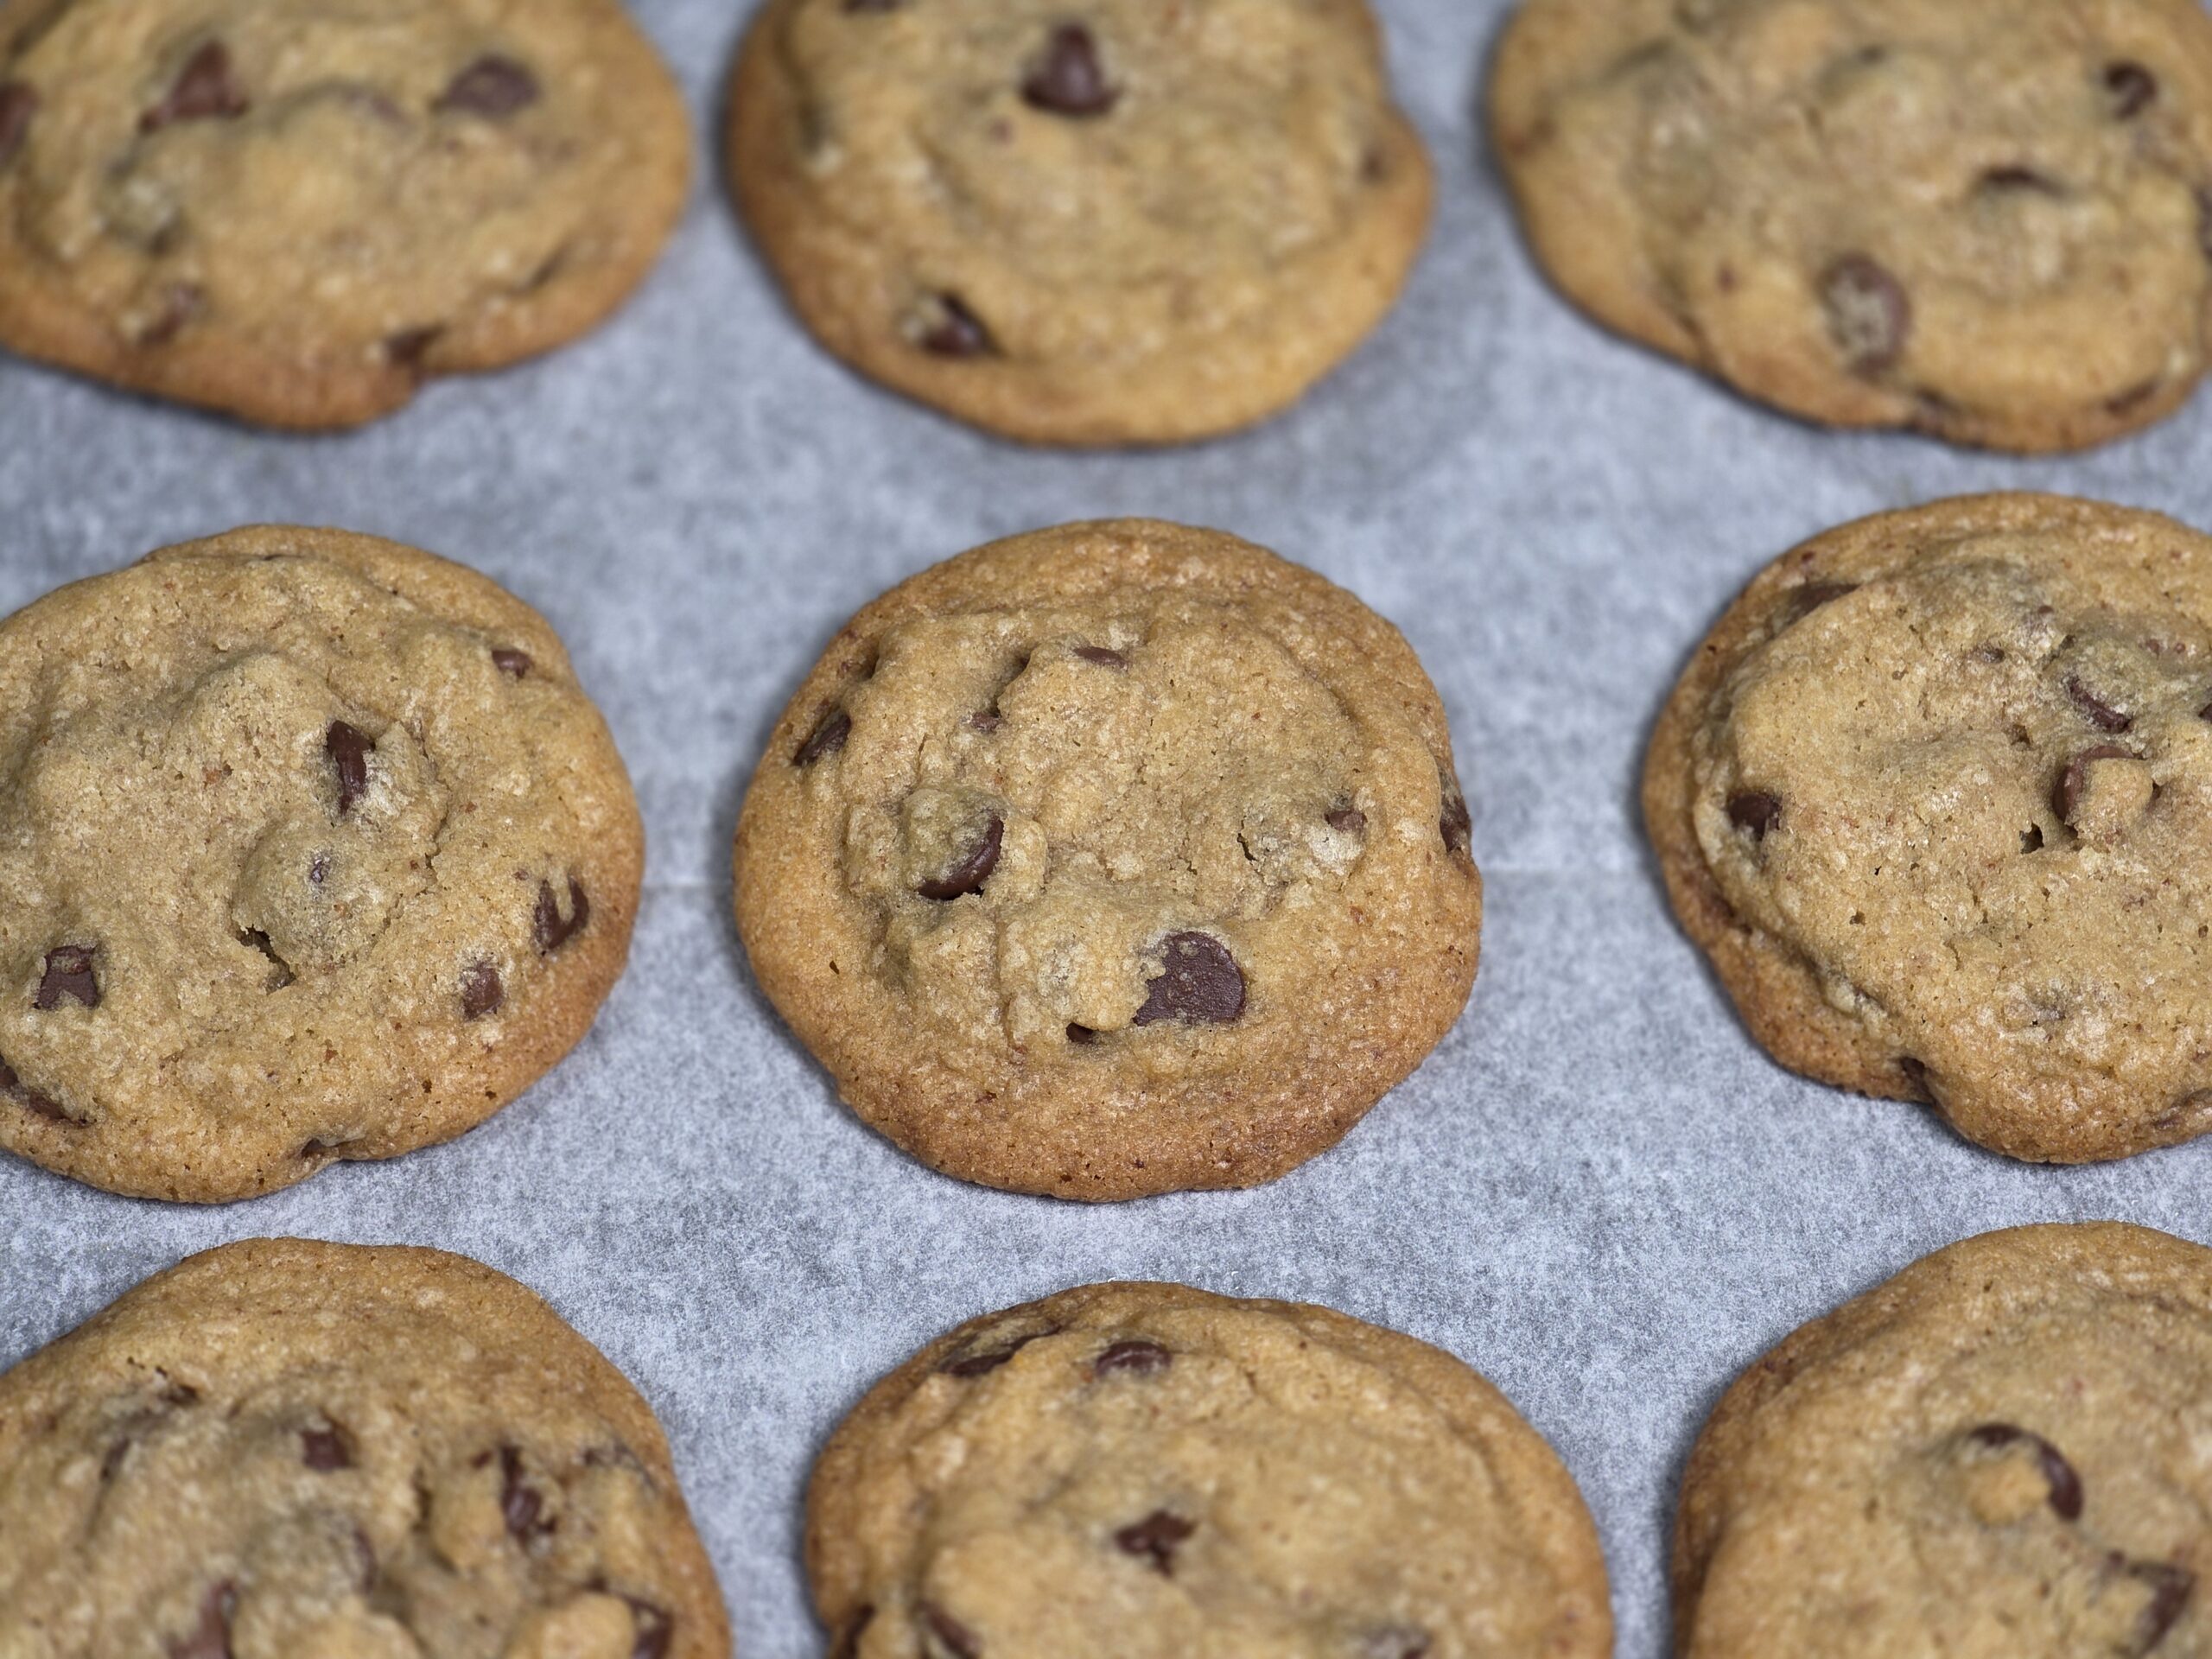
You’d be hard pressed to find anyone who doesn’t love fresh-baked Chocolate Chip Cookies! Everybody, their mamma and their grandma claim to have the best recipe. Me personally, I haven’t been impressed by the chocolate chip cookies I’ve tried at various bakeries, or even the various recipes I’ve tried online. Now don’t get me wrong, they were all very good. However, there was always a little something I just couldn’t put my finger on that was missing from all of them that kept them from being perfect. So I sought out to make homemade chocolate chip cookies recipe that strike the right balance of richness crispness and chewiness. After countless hours of testing, this recipe hits the spot for me.
Key Ingredients for Crispy and Chewy Cookies
The dough for the chocolate chip cookies is made from your standard ingredients: Flour, Baking Soda, Table Salt, Sugar, Butter, and Vanilla Extract. That said, what makes this recipe stand out from the rest is the use of Cardamon, Brown Butter and Molasses.
- Brown butter: Why? For one, the browned milk solids that separate will give the cookies a pronounced toasty, nutty taste, which enhances the richness of their flavor. Also, unlike with softened butter, whisking the melted brown butter with the sugar until well-combined will ensures that the sugar crystals are evenly distributed through the batter and there are no bland pockets. Using melted browned butter vs regular melted butter also helps to reduce the amount of water that ends up in the cookie dough, which prevents the cookies from spreading out too much. However, I advise allowing the butter to cool for at least 10 minutes after it’s finished browning, to ensure you don’t scramble the egg that will be added.
- Adding molasses separately: There are many recipes call for both white granulated sugar *AND* brown sugar. That said, after testing out & tweaking this recipe quite a bit, I found that you get the best result if you only use white granulated sugar then add pure molasses separately after having combined the butter, sugar and egg. For one reason, while brown sugar is essentially the combination of white granulated sugar and molasses, it turns out that pure molasses by itself tends to have even more moisture, which is what will give the interior of the cookies that soft & chewy texture. It also gives the flavor of the cookies more of a pronounced caramel-y note that really compliments the chocolate.
- Cardamom vs. Cinnamon: Now you’re probably saying to yourself “What the heck is a Cardamon!?” Believe it or not, they are similar in many ways. They’re both considered what can be described as warm, complex spices that are commonly used in desserts. However, the Cardamom helps to give the cookies a pungent, citrus-y undertone that you typically won’t find with Cinnamon. In essence, it will give the cookies a complexity of flavor that will be hard to replicate, so your guests will know for certain your cookies aren’t store bought. Cardamom also tends to be more aromatic, which is nice if you’re trying to impress guests with the smell of your baked goods.
- 1 Egg vs 2 Eggs vs Only Egg Yolks: I tested out this recipe with 1 Extra Large Egg as well as 2 Extra Large Eggs. Ultimately, I found that adding 2 eggs gave the cookies more of a spongy texture and taste of eggs were quite overpowering in the final product. Furthermore, there are many recipes that will call for using 1 egg plus egg yolks (or in the case of my other cookie recipes, all egg yolks). I opted against using all egg yolks for the chocolate chip cookies because the protein in the egg whites helps the cookies to firm up easily before they end up like pancakes by drying out any excess moisture in the dough.
And lastly, there’s one more thing I can’t stress enough. Cookies are highly sensitive to the proportion of fat vs protein (I.E. flour and egg whites) that is used. Even being off by a mere tablespoon can completely change the shape, texture and flavor. That said, I strongly advise that you use a spoon to gather your flour and even level off the top of the measuring cup with a knife. If you scoop out the flour with the cup itself, you risk packing way more flour into the cup (and eventually the dough) than what is required, thus your cookies won’t bake properly. Weighing your flour with a bowl and kitchen scale is also a perfectly fine option.

Tips for Making this Recipe
If cookies are too puffy, slam bottom of cookie sheet on flat surface. The way baking soda works, the heat in the oven will initially cause the fat in the cookie dough to melt and spread out quickly. That said, in thew final few minutes, the baking soda will be activated and the cookies will really puff up. This is due to all of the Carbon Dioxide that has built up from the baking soda that has dissolved. That said, if they’re too puffy for your liking, when you first take them out of the oven, forcibly slam the bottom of your cookie sheet on a flat surface. This will release the air that has built up in the cookies.
Allow the chocolate chip cookies to cool for a minimum of 10 minutes after removing from oven. The inside of the chocolate chip cookies will continue to set and coagulate even after you remove them from the heat. If you attempt to remove & eat the chocolate chip cookies too soon while they’re still hot, you risk having them fall apart.
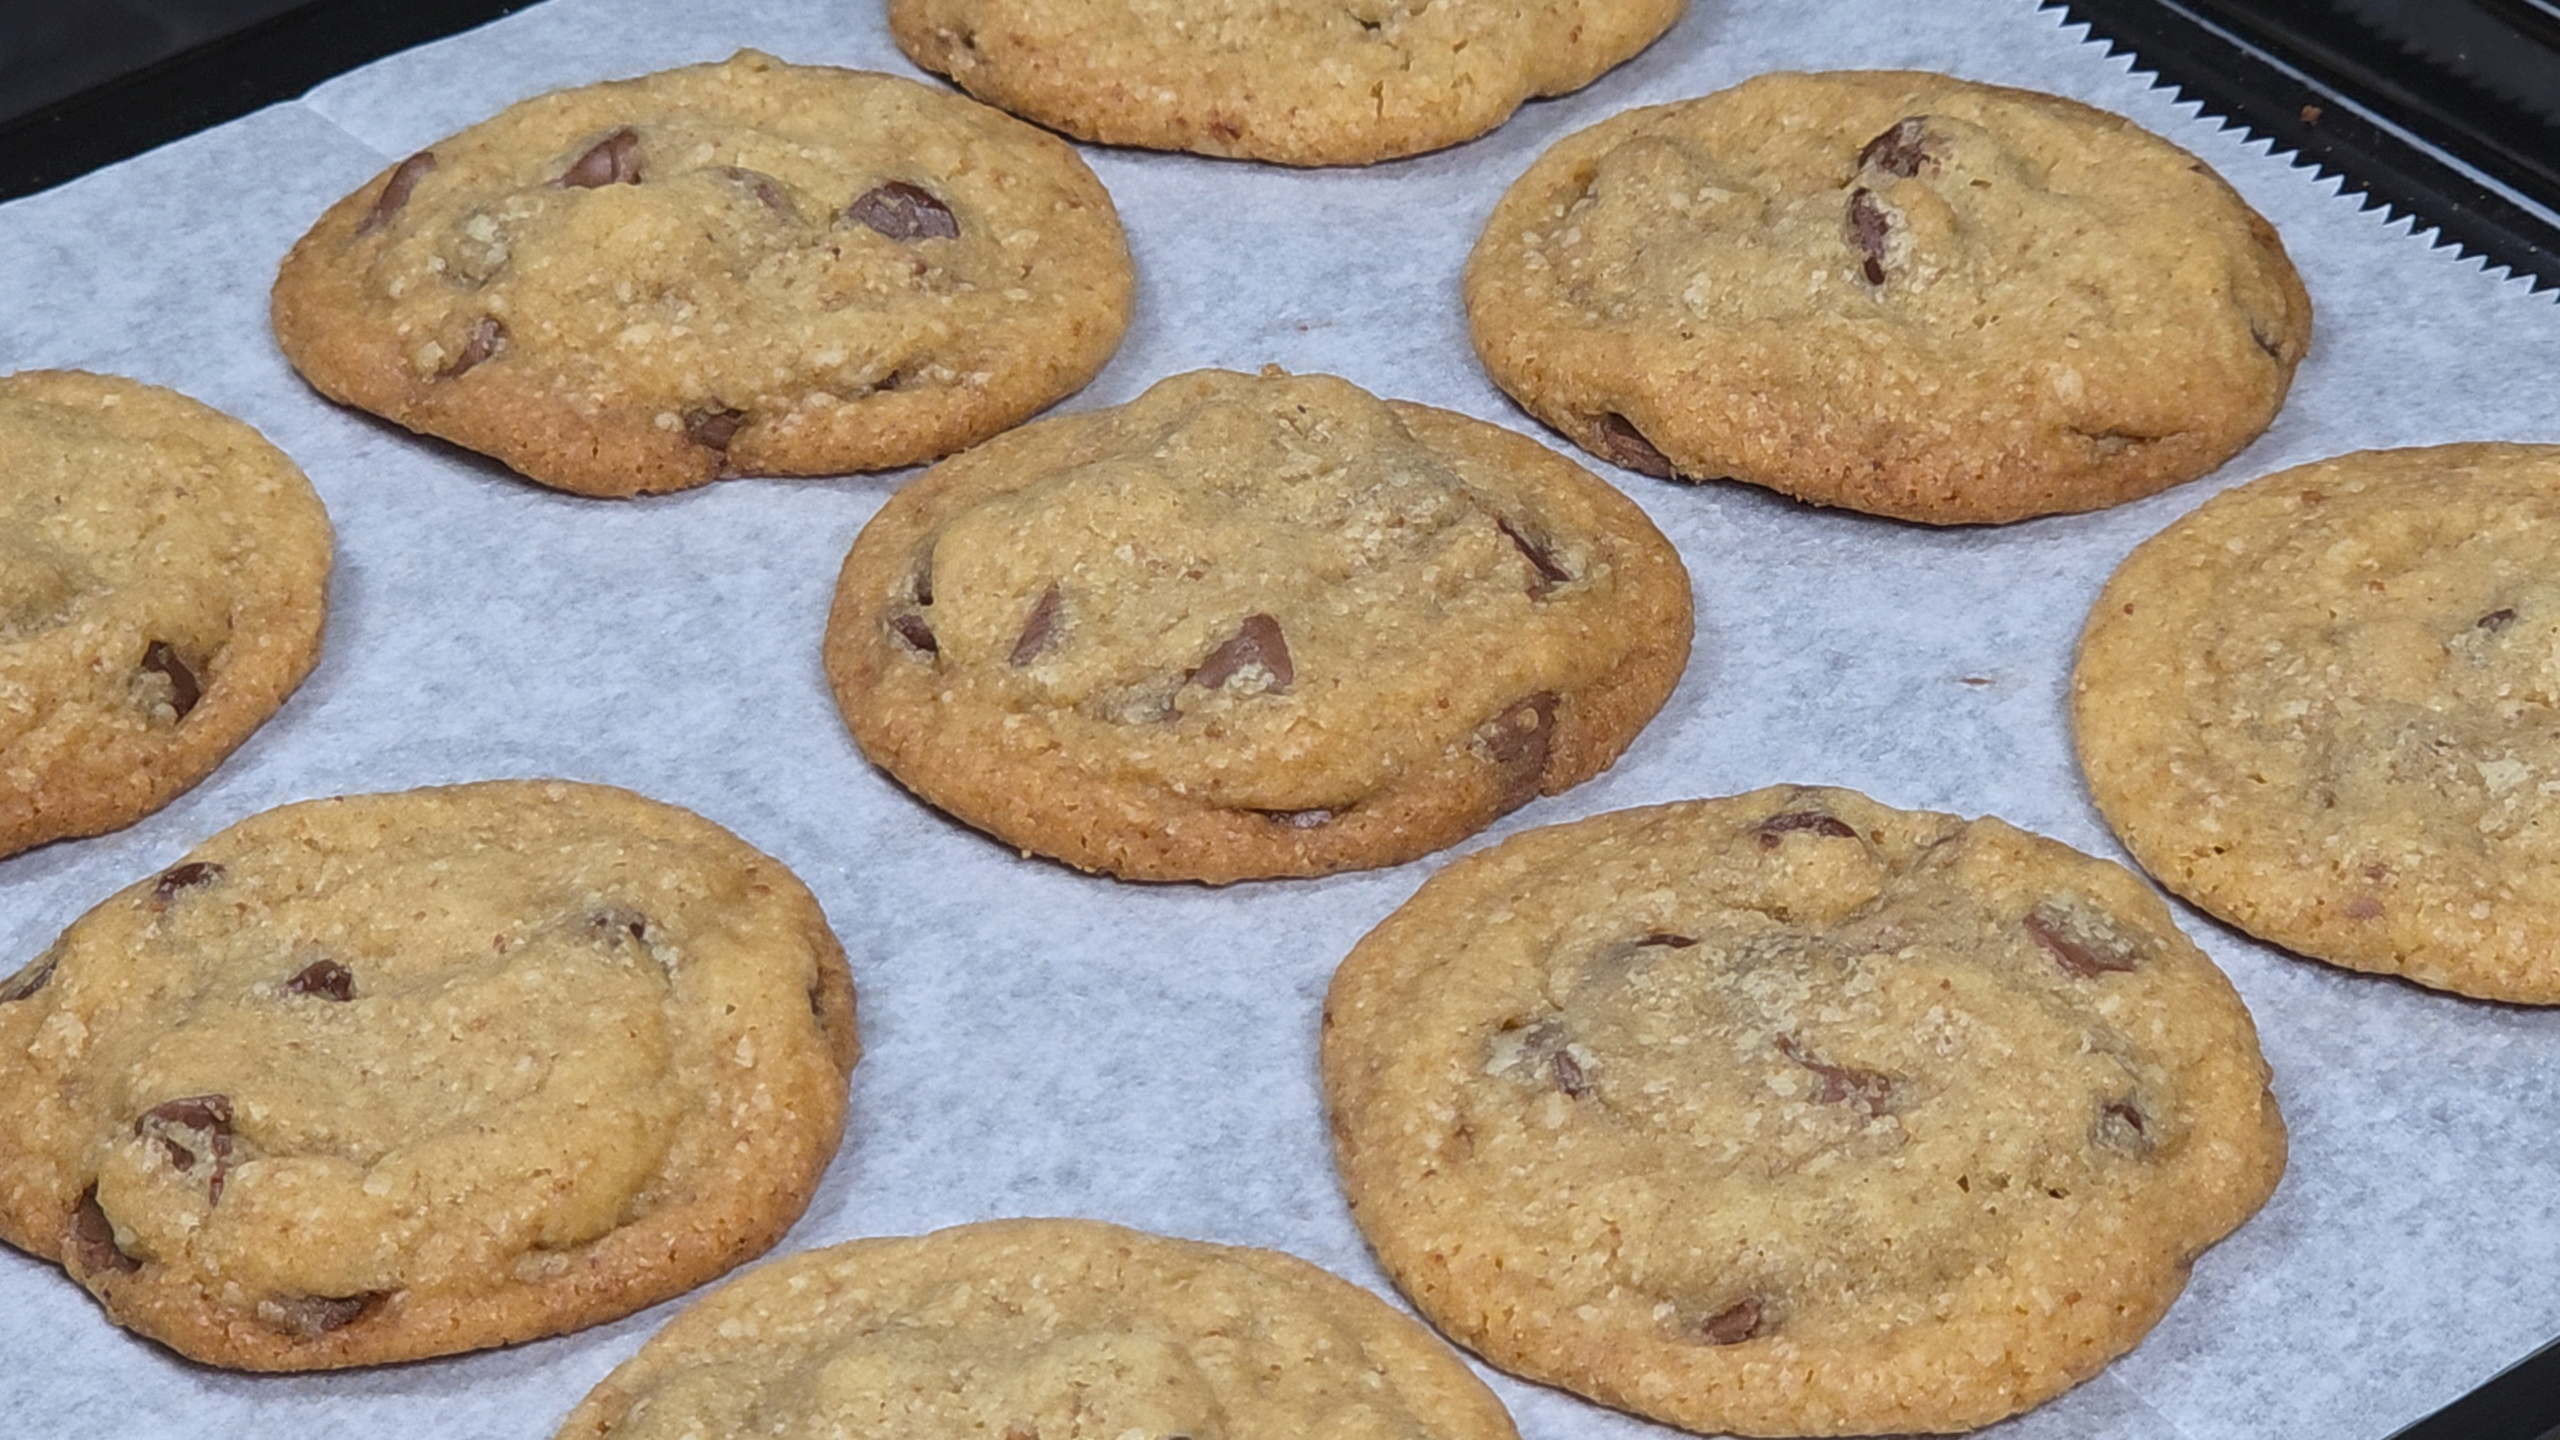
For the best results, use parchment paper. There are some recipes that suggest you can place your cookie dough on greasy (or lightly greased) cookie sheets. The reason I advise against this is because this can cause both the bottom of the cookies and the edges to overcook and burn (thus, in my humble opinion, making the cookies unappetizing). Meanwhile, if you decided to wing it by just placing the dough on a care cookie sheet, you risk having the cookies stick onto the cookie sheet as the fat melts then re-solidifies during the baking process. I strongly advise placing the cookie dough on parchment paper to ensure minimal sticking, sufficient browning as well as the right amount of spread.
Use a cookie scoop. Why? For one reason, it’s a way to avoid having to scoop & roll the dough for the chocolate chip cookies and get your hands dirty. But also, a scoop will ensure all of the chocolate chip cookies are the same size and they bake evenly. In fact, as extra insurance, I even like to level the dough in my cookie scoop with a knife (but doing this is optional). For this recipe, I used a 2 TBSP (1 oz) cookie scoop, and do note servings will vary if you use a smaller or large cookie scoop.
Bake a test cookie (or two). The problem with many home ovens, especially if they’re older, is that not all of them are properly calibrated to heat to the correct temp (some of them run too cold or even too hot). To ensure you may not have to adjust the temp higher or lower by about 25 degrees, it may not hurt to test some of the dough for the chocolate chip cookies before attempting to bake it all at once to ensure they come out per the recipe instructions given.


Frequently Asked Questions
Can you add Pecans, Walnuts or Macadamia Nuts to this recipe?
I’m personally not a fan of having these extra ingredients in my chocolate chip cookies (personal preference), which is why I officially excluded them from my recipe. That being said, if you prefer having these items in your chocolate chip cookies, you can certainly add them while combining the wet + dry ingredients.
Is it required to chill the dough?
While there are many recipes that require you chill the dough, the nice about this one is that is does *NOT* require any chilling prior to baking. That being said, for the best result, I highly recommend allowing the dough to rest at room temperature for 15 minutes. This will allow time for the flour to fully hydrate (which will help to give the interior of the chocolate chip cookies a chewier texture) as well as allow time for the butter to firm up, so that there isn’t excessive spread of the cookies once they’re in the oven.
Why did my chocolate chip cookies spread too much (or not spread enough)?
While there are countless reasons why your cookies either spread too much or didn’t spread enough, often times, the answer boils down to either using too much protein (I.E. Flour & Egg Whites) or too much fat (I.E. Butter & Egg Yolks). For this recipe, it is imperative that you not only brown your butter, but that you also spoon & level (or weigh) your flour. If you attempt to substitute the brown butter for melted or softened butter, you’ll end up with too much moisture in your cookies as roughly 2-4 Tablespoons of water evaporates during browning. Meanwhile, if you fail to spoon & level your flour, you could end up accidentally packing too much into the recipe.
Can you substitute Oil for the Butter?
The answer to this question always gets tricky.
I do understand that not everyone is able to eat dairy products and that butter is simply not an option for such individuals. In such cases, you *COULD* replace the butter with a cooking oil, but with a couple of important caveats. For starters, while cooking oils and butter are both different types of fats that can be used in baked goods, their fat composition is not entirely equal. Cooking oils tend to have virtually no water in them (thus is 100% fat), whereas Butter typically has a water content of 20-25% (depending on the brand). So in the even you attempt to substitute the butter for cooking oils, I’d advise only using 3/4 cups of the cooking oil.
The other caveat is that the use of cooking oils will change the flavor profile of the cookies. Seed oils (I.E. Vegetable Oil, Canola Oil, etc.), are known to be neutral-tasting, meaning they have no flavor. So you will be losing the subtle nuttiness / sweetness in your cookies that Butter offers. But then you also have your non-seed oils such as Coconut, Avocado or Olive Oil. These oils are *NOT* neutral-tasting, which means if you use them, you may end up with cookies that taste like Olives, Avocados or Coconuts, as the oils will overpower the other ingredients
All of that said, the short and sweet answer I can give you is I *DON’T* recommend it. And you absolutely should *NOT* attempt to brown oils or shortening. For a more detailed answer, see above.
Can you freeze the dough? And if so, for how long?
You can definitely freeze these chocolate chip cookies! Once the dough has rested and you’ve scooped them into individual servings, place them in a freezer bag and they should maintain their freshness for at least 3 months. While they may still be safe ton eat for up to 6 months in the freezer, the chocolate chip cookies will gradually lose their flavor and texture after 3 months have passed. For the best spread, I would advise allowing them to thaw at room temperature for 1-2 hours before baking them in the oven.
How long can you store Chocolate Chip Cookies without freezing?
As long as the chocolate chip cookies are stored in a airtight container or bag, they should be safe to eat for at least 3 days. After 3 days, they may begin to lose their flavor & texture. Once 5 days have passed, I would advise that you dispose of the chocolate chip cookies as they may no longer be edible.
Try These Other Cookie Recipes
-
Best White Chocolate Macadamia Nut Cookies
-
Best Sugar Cookies From Scratch
-
Best Soft & Chewy Peanut Butter Cookies
-
Best Pillowy Snickerdoodle Cookies
-
Best Chewy Gingersnap Cookies
-
Best Oatmeal Cookies (NO Raisins)
Best Crispy and Chewy Chocolate Chip Cookies
Equipment
- Whisk(s)
- Plastic Spatula (s)
- 2 Large Mixing Bowls
- Parchment Paper
- Baking Sheet(s)
- Measuring Cups/Spoons
- 1 Knife
- 2 TBSP Cookie Scoop
Ingredients
- 1 3/4 Cup All-Purpose Flour
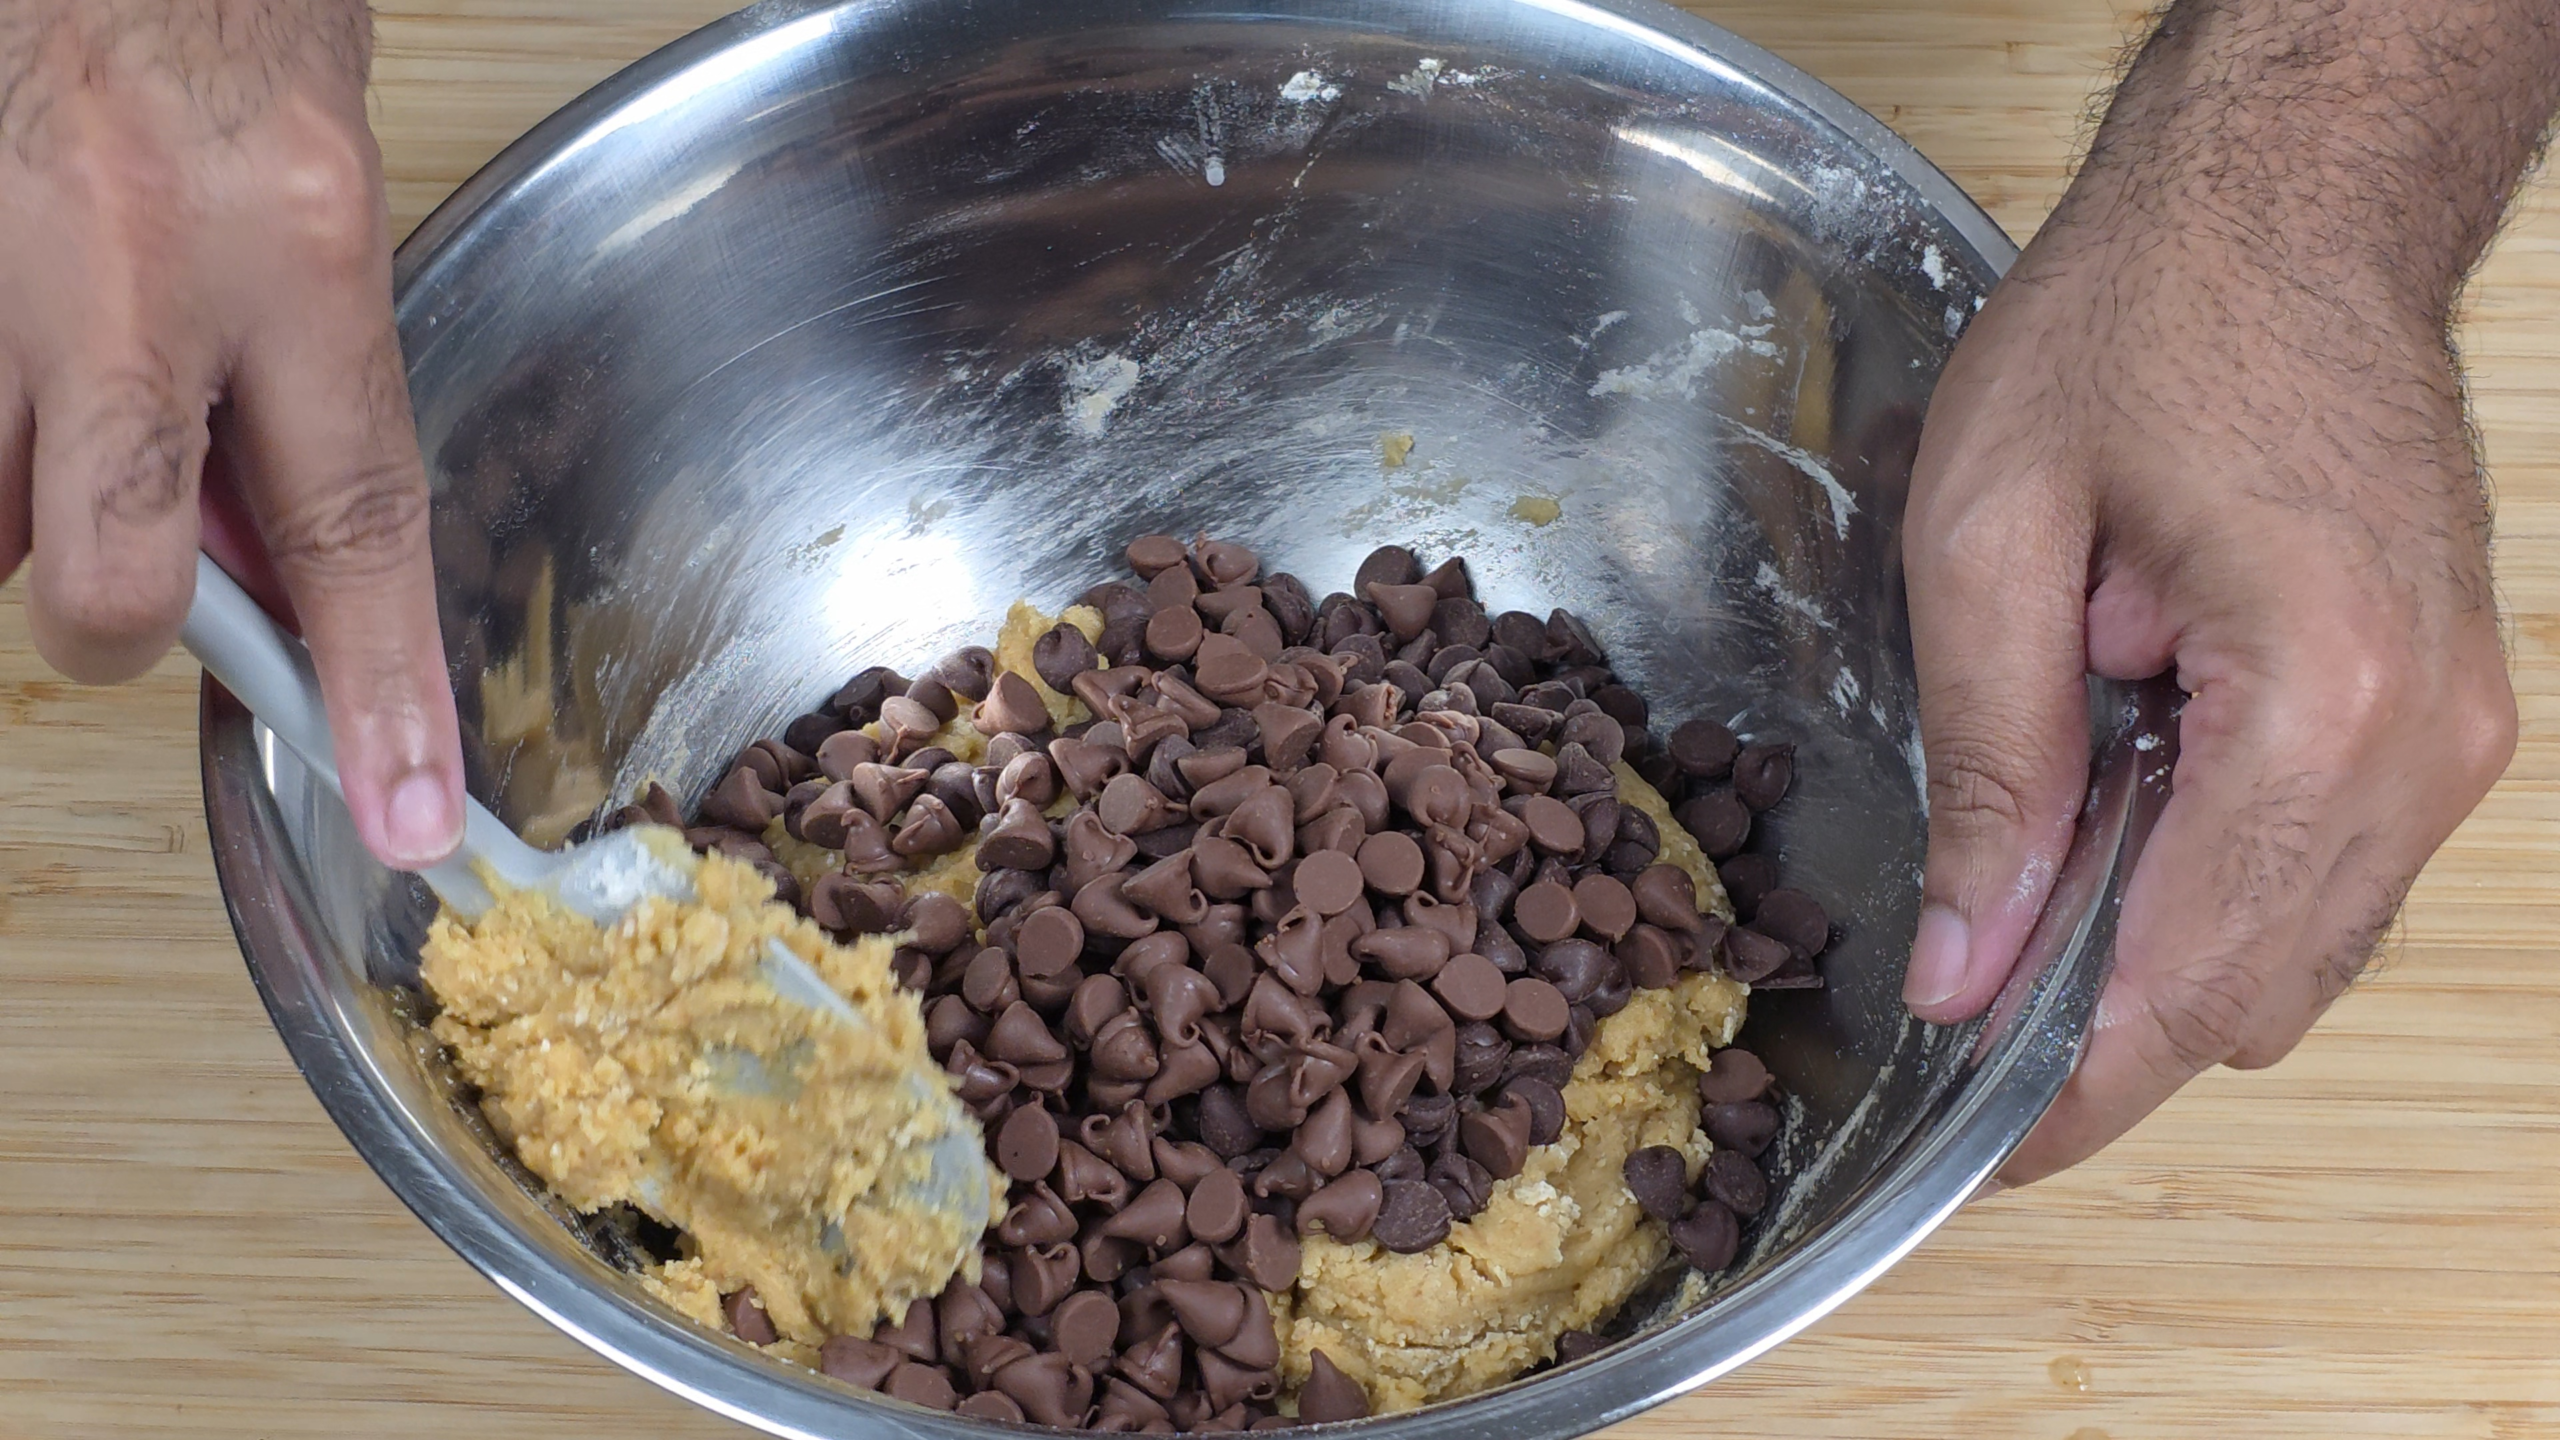
- 3/4 Cup Semi-Sweet Chocolate Chips
- 3/4 'Cup Milk Chocolate Chips
- 1 TSP Cardamom
- 1 TBSP Unsulphured Molasses
- 1 Cup White Granulated Sugar
- 1/2 TSP Iodized Salt
- 1 TSP Baking Soda
- 1 Cup Brown Unsalted Butter
- 2 TSP Vanilla Extract
- 1 Extra Large Egg
Instructions
- Using Light-Colored Skillet or Pot, Brown 1 Cup of Unsalted Butter on Medium Heat (Approx. 5-8 Minutes After Butter Has Melted) While Stirring Constantly.
- Remove Browned Butter From Heat and Allow to Cool For 10 Minutes.
- Combine dry ingredients (Flour, Baking Soda, Cardamom and Salt) in large mixing bowl.
- Whisk dry ingredients until combined.
- Add butter + sugar in a separate large mixing bowl.
- Whisk butter with sugar until well-combined (approx. 60 seconds).
- Add other wet ingredients (Egg, Vanilla Extract, Molasses) to combined Butter + Sugar and whisk for 30 seconds each until combined.
- Add wet ingredients into bowl with dry ingredients and fold until just combined.
- Fold chocolate chips into cookie dough until just combined.
- Preheat oven to 350*F and line cookie sheet with parchment paper.
- Using cookie scoop, place dough onto cookie sheet and ensure they are evenly spaced.
- Place cookie sheet(s) in oven and bake for 10 minutes.
- Allow cookies to cool before serving.